Shellback Build Begins

12
12

|
The hull panels were fastened to the stem, frame and transom as described in the plans. All of these joints have been made with thickened epoxy, but this is Joel White's method and I'll honor him with fifty-some silicon bronze screws buried in the hull. I think the hull would have been sound with only the epoxy.
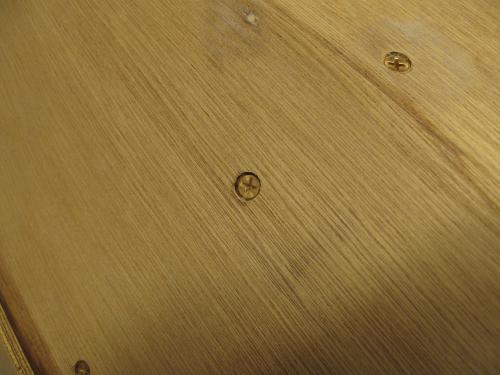 In preparation to fastening, I had removed all of the temporary fasteners, drilled and countersunk the screw holes then injected each with straight epoxy to afford the screw penetrations a little more protection. The epoxy was heated to about 75 degrees F to provide a slightly thinner mix. The next day, the screw holes were chased with the same drill & countersink. 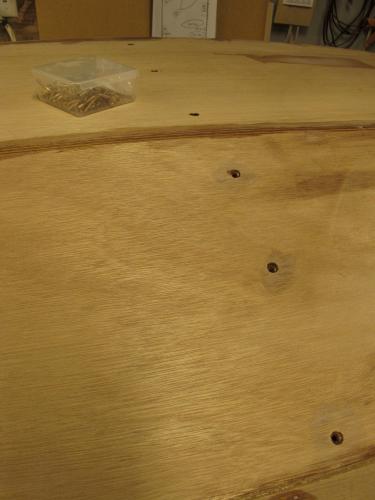 After fastening, the screw recesses were filled with fairing compound and the hull fairing was continued. It came out extremely fair and only minor fairing has been required.  Today I filleted the plank overlaps on the Starboard side with Russell Brown's filleting mix. The stuff is magic! I'll do the other side tomorrow. Then I'm ready to glass the bottom.  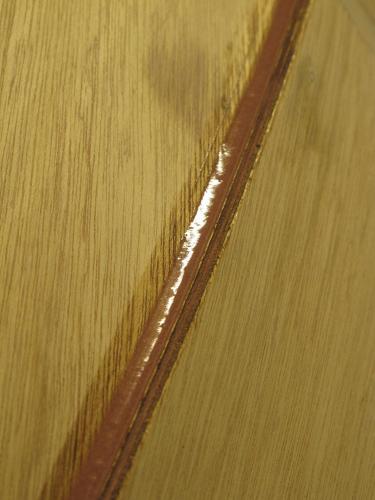
|
|
|
At this point I am nearly ready to turn the boat over. First, I need to fit the outer stem and glass the bottom. The stem was attached to its final position with temporary screws.
 A 5/8" flat was marked on the face to plane to. The stem was shaped with a block plane to near its final shape then removed. This allowed the fiberglass to be draped over the hull. 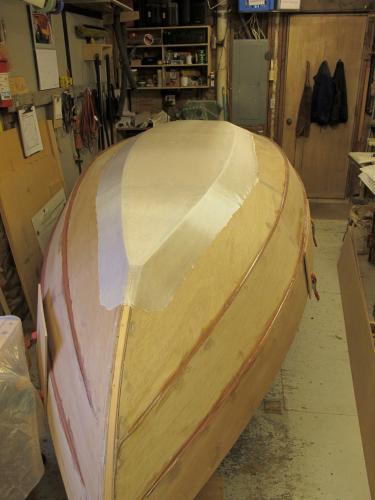 Glass is not called for in Joel White's plans. Since this boat is intended to be beached, I decided a little extra protection of the bottom was a good idea. Shortly after this photo was taken, I started mixing batches of epoxy and wetting out the fiberglass. Once fully wetted out, another coat was added and I started applying Peel-ply. Peel ply is a synthetic cloth that is applied over the wet epoxy & glass. It will be ripped off tomorrow once the epoxy has set up. 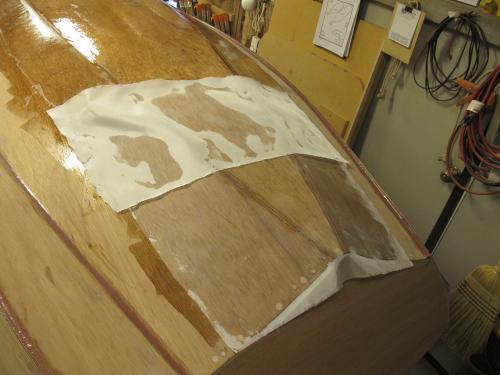 I need to give a big shout out to Randy Torgerson on the peel-ply. I had used it on small areas before, but Randy used it to cover his whole hull! It's a little touch of brilliance as the peel ply reduces the amount of epoxy that stays on the boat, makes that coating very uniform and reduces sanding time required. In a matter of half an hour, I had the entire fiberglass surface completely covered.  This should yield a strong, smooth finish that is as lightweight as it possibly can be. You must be careful to squeegee the peel-ply smooth and flat against the epoxy. Sometimes you get small bubbles of air or folds of material. Unlike fiberglass cloth, it doesn't stretch. Sometimes you get bubbles like these. 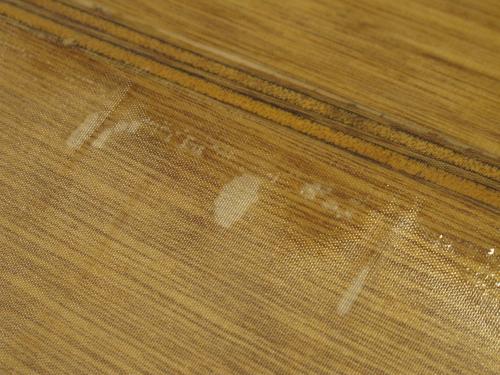 These little flaws will require a bit more prep before priming the hull. Still, it's a nice method if the hull will accept it. The half hour of peel-ply application will probably save four hours of sanding. The result will be just as strong and lighter in weight. |
|
|
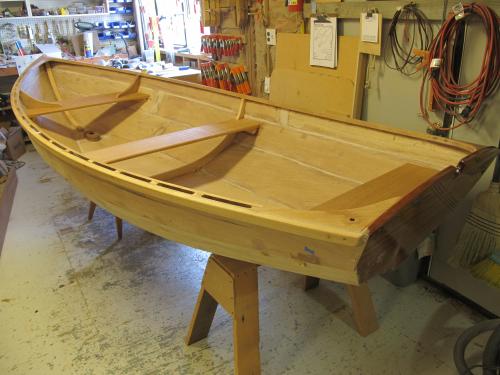
The little hull was faired, the plank overlaps were filleted and the boat was turned this week.
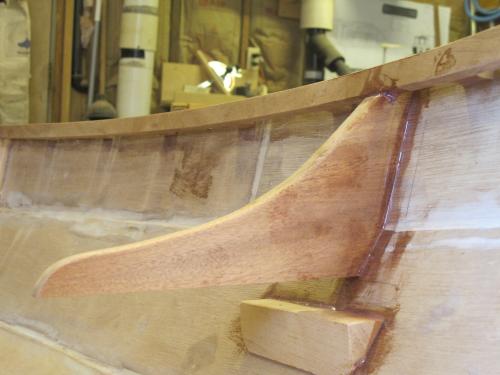
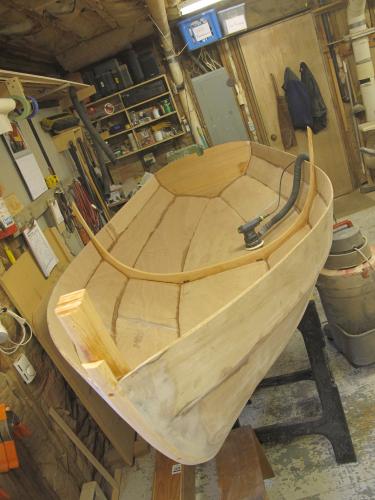 The interior of the hull is now being faired. A few areas need additional fillets to structure joints that were not fully filled with reinforced epoxy, but not many. This is my first attempt at clinker plywood construction and I'm finding that the first joints are often needing more thickened epoxy. Conversely, the later joints are requiring more clean-up!  I clamped the knees into place. Much to my surprise, they fitted almost perfectly. If it was a "good enough" boat and that was my inclination, they would have been OK, but I'll fit them a bit more carefully. Mr. White knew what he was doing when he designed this boat!  I started fitting the knees, but I'm tired. Here is how they are for the moment, but I'm still not finished.  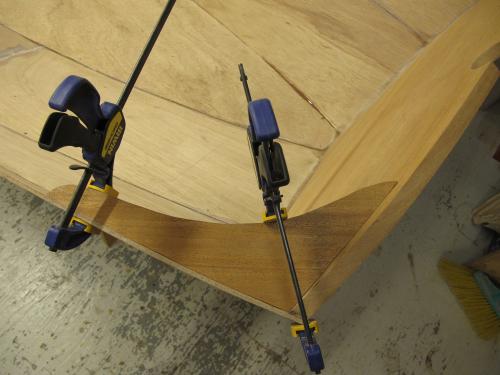 Time for bed now... |
|
|
A lot has happened on the Shellback but it really doesn't show. The breasthook was rough-fitted and glued.
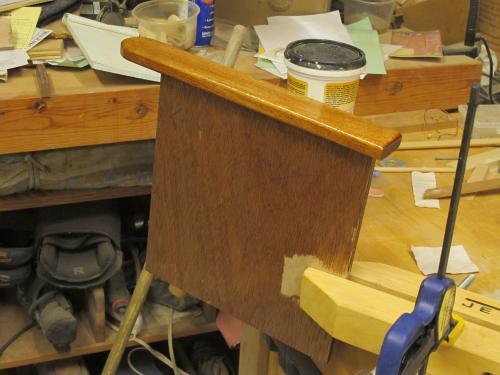
 Originally I had thought I might fancy-up the breasthook with some figured maple, but the boat has taken a turn toward more simplicity, so that was abandoned. Additional fairing of the interior planks and seams have been done. A coat of epoxy was applied to the transom and holes were drilled for the quarter knees.  The quarter knees have been shaped and just need to be notched for the inwales.  Some final fitting of the Breasthook was done. 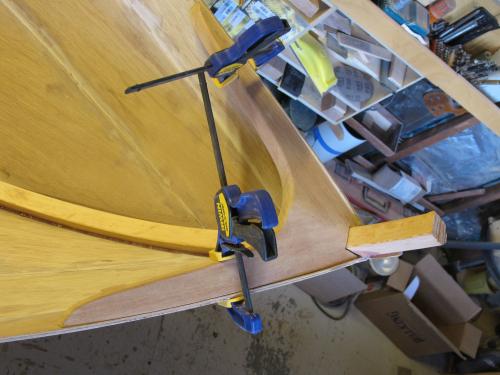 Today it was a beautiful, clear, dry day. Perfect for transporting long lengths of mahogany that have to ride on the roof rack. I purchased a 12' length of Khaya to make my outwales. At the RiversWest shop the inwales and outwales were ripped and surface planed to dimension. That's the next project! |
|
|
In reply to this post by MarkR
A few days pass and the boat is starting to come together.
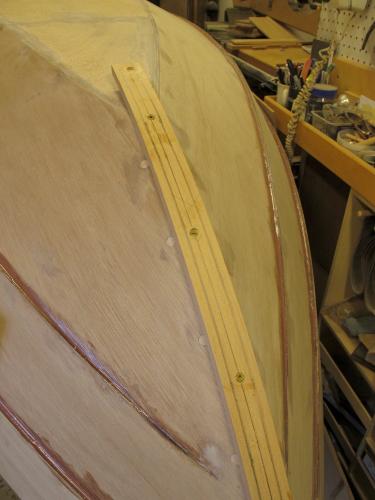
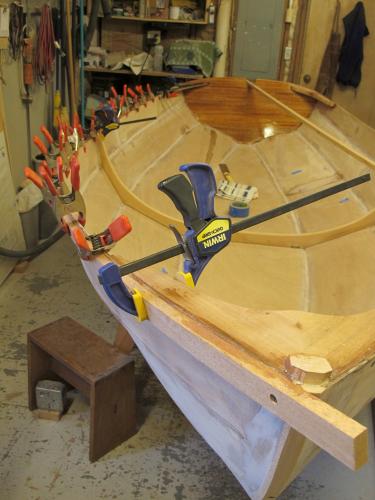 The Starboard rail was installed. Lots to setup in this operation as it needs to be just right. For now, the rail was fastened with a screw at the bow and stern and epoxied all along the sheer. The Port rail followed.  It's a procedure that uses a lot of clamps. 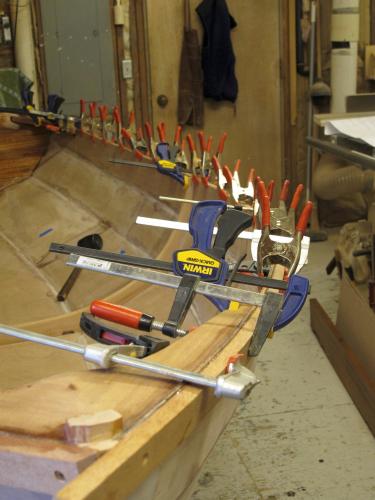 Once both rub rails were fitted and glued, the Starboard inwale was fitted. This is a time consuming process as the length has to be perfect and there are lots of small pieces to fit. Below, it's all clamped up in position, taking a set overnight.   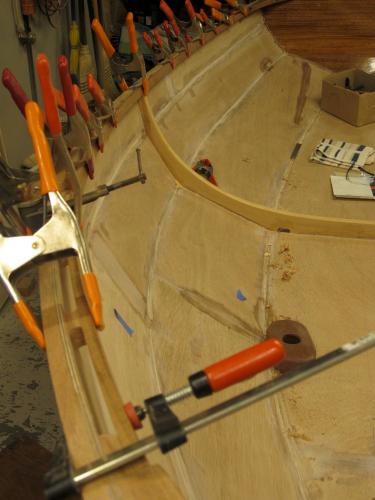 That's all for now. That inwale will be glued in the next session. The Port rubrail will be allowed to dry and the inwale fitted there, too. |
|
|
Mark,
Were it my boat, and were I to use the style of scupper block you did, I'd have echoed the curve of the block in the corner knee, which still could be done. It all depends on how obsessive a builder is about symmetry and proportionality. For the breast hook, I might do the same, or even reverse the curve from concave to convex. It would depend on how many inside jokes I was trying to play with the materials. Your photos make much more sense now that I've seen the actual boat. Also, though 7-1/2' oars are called for in the plans, I think the boat's breadth and depth mandate 8' footers when oars will be the primary propulsion. For the auxiliary pair, I'd go the other direction and knock off 6" (or more) to make them more stowable. But what makes sense with that boat can only be determined once the boat is in the water. Kudos on the build. Charlie |
|
|
Charlie,
I completely agree on the scuppers. They trouble me. I have a routing pattern designed that I will make when I return. Then I'll match up the breasthook and quarter knee scupper ends to match the mid-point scuppers. I think it's the better way to go and it will fit the boat. Here is is as I've just left it:  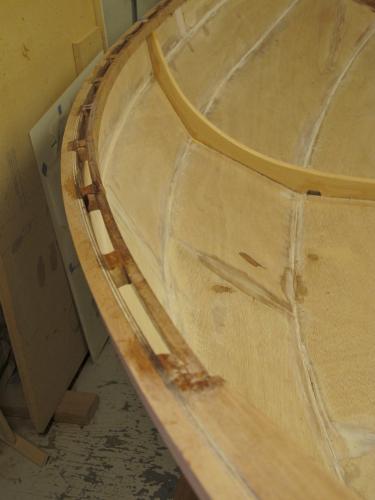 The bow and breasthook was rough shaped: 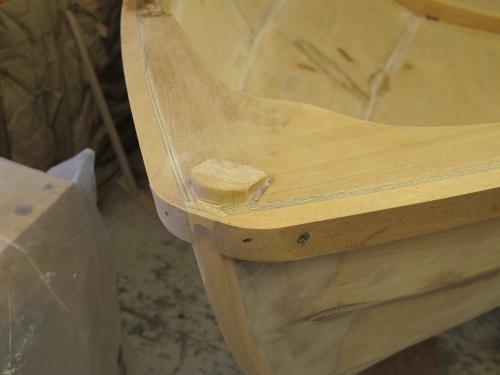 The mahogany planes beautifully.  By the time I left, she was looking like a real boat! 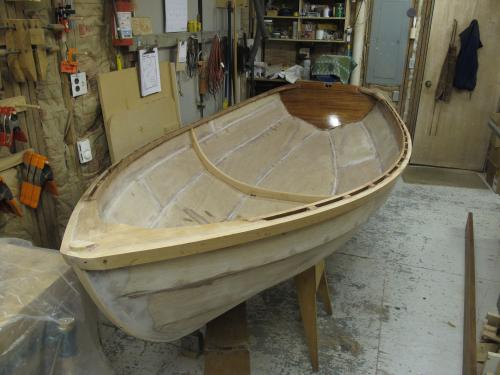 |
|
|
Mark,
I love your photos. They do a good job of showing essential details. Also, they make me realize how much of boat-building is just personal preferences. E.g., the mid-frame.To my eye, it looks lonely, like there should be at least four more of them, set radially rather than axially, or else get rid of the mid-frame and beef up the gunnel to compensate. Also, compare its size to the inner stem. I think the mid-frame is too delicate. E.g., the cutwater-inner stem-breasthook-and outwale tie-in assembly. To my eye, that unit doesn't work. I'd have made the cutwater more massive, not run the outwales in front of it (but landed them on either side of it), and tied the inner stem to cutwater and run them higher. E.g., the size/shape of the scupper blocks. My inclination would have been to have made them rectangular, longer, and spaced more closely. As they are, that's a good looking gunnel assembly, but also, a bit delicate compared with the massiveness of the rest of the boat. E.g., lack of a transom knee. I'd have echoed the massiveness of the inner stem with a transom knee and echoed both in my (at least) five frames. The intended visual effect would be "sturdiness", but without being "over-built", a boat that borrowed from its workboat origins, but without repeating their typical "heaviness". But as I said, every builder has a different eye and different expectations as to what is "pleasing". Charlie |
|
|
Thanks for the comments, Charlie. I'm building the boat as Joel White designed it, just minimizing weight where I can because it will be car-topped; then adding in a few details that will make the boat more usable to me. Like the scuppered inwales.
Upon my return, the scupper ends were attended to. I had tried something that I really didn't like with the scuppers where they mated to the breasthook and quarter knees. I kept the original form of those parts. It came out like this: 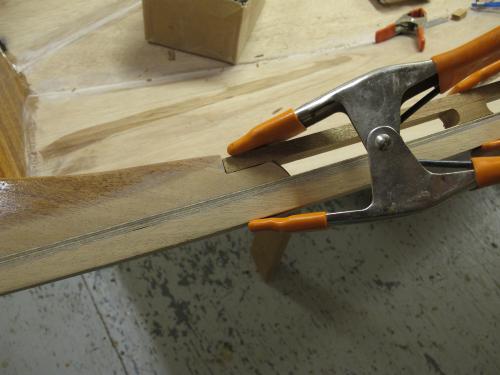 Not a good look to my eye. I wanted to mirror the other end of the scupper, so I made a router template to guide the cutting of the other end. 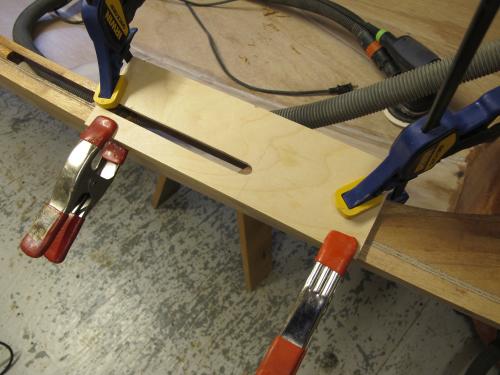 A 1/4" pattern bit with top bearing was used to cut the end of the scupper. It was cut in three passes to avoid cutting away too much material at one time. The result was much more pleasing. 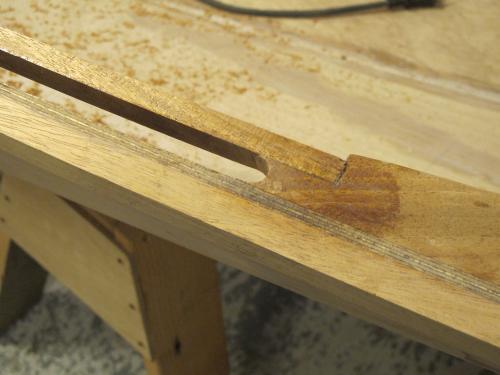 A little extra shaping of the knee and it looks like it fits there. 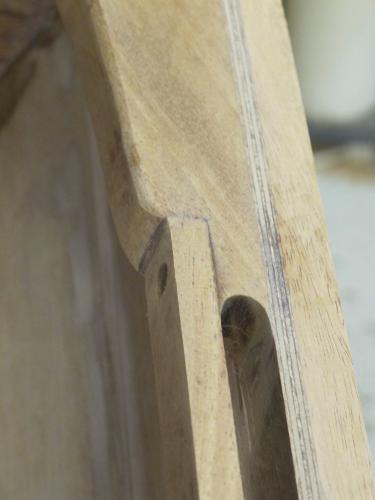
|
|
|
This post was updated on .
Mark,
Kudos on that scupper block fix. It looks good. As for boat weight vs its car-topablility, that's a whole 'nother issue. A boat as fat as the Shellback makes a good trainer, but it isn't as easily car-topped as a boat of same length, but narrower beam and less depth. But that lighter boat is a more demanding boat to sail. So you've chosen to pay for ease of use on the water with weight on the roof racks, which, given the age of your nephew and the fact the boat can later be re-canvased, makes good sense. I still don't like the look of that mid-frame, and I'd want a transom knee. The small amount weight those changes would make wouldn't make the boat uncartoppable. But they would depart from what you are calling "the original design", which I'm always willing to change for regarding any designer's rendering of anything other than the lines of a boat (as is captured by a table of offsets) as mere suggestions that can and often should be done in a different way by each builder. Thus, if I change the numbers in his/her table of offsets --which I frequently do-- I'm not building his/her boat, but a variation of a boat type, of which theirs and mine are simply instances. They borrowed and tweaked. I borrowed and tweaked. No biggie. OTOH, if I change only the detailing, but keep their offsets, I'm building his/her boat and owe them a designer's fee, because I'm using their design, not mine. Why keep a designer's lines? Because the lines might be worth keeping. But more likely, the reason for keeping the lines has more to do with brand recognition, hence, marketability of the hull. Thus, inertia and tradition perpetuate boats whose shapes should have been improved long ago with judicious changes here and there. How minor can the changes be before it can be called "a new design"? That, I don't know. Charlie |
|
|
This post was updated on .
The last few days, my attention has turned to fitting the thwarts. A three piece plywood pattern was made that allowed the two ends to be fitted to the hull. Each end piece is fitted to approximate shape, then the end is piled to fit with a compass. Finally, the bevel is picked up from the planking and the thwart (seat top) is cut to size and shape on the bandsaw. The forward thwart was done first. It's the most difficult fit as there are knees to brace it as well as seat blocks.
   The seat blocks and knees were glued in after carefully fitting them in place. There has to be just enough room to slide the seat into place, but not too much! The knees had to be trimmed just a little bit for a good fit. All of the thwarts are removable for maintenance. Thwarts are made of Spanish Cedar for its combination of strength and light weight. It's also beautiful to work with. 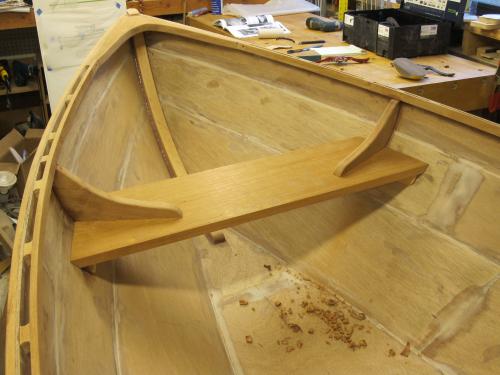 The forward thwart was the most difficult to position. The aft thwart was located, a pattern made and then cut to size and shape. This was almost too easy! Next the seat blocks will be located and glued into place.  Notice that the aft thwart is located 4" forward of the transom. Joel White did that so the daggerboard and rudder could be stowed there. Next I'll fit the center thwart. But tomorrow is another day! |
|
|
Mark,
Now that you're fitting thwarts, which are structural and massive, the slenderness of the mid-frame makes sense to me. It's going to be a good-looking boat. But then, that's why you selected the set of plans you did, right? Do you have any sense of how many hours of work the boat will need from start to finish? Charlie |
|
|
All of the thwarts are now fitted and seat blocks glued into place. The thwarts are shaped to visually 'lighten' them by doing about a 3/8' X 1" chamfer on the bottom, while the top gets a round over to ease the edge of the seating surface.
 The mast step was positioned and dry-screwed through the bottom in its proper place.  Finally, the mast step was removed and both mating surfaces were primed with straight epoxy, thickened epoxy applied to the joint and then screwed into place. The forward thwart serves as the mast partner. The hole for the mast in the forward thwart was located as a part of this process, but not drilled. The location of this hole will be double checked prior to drilling. 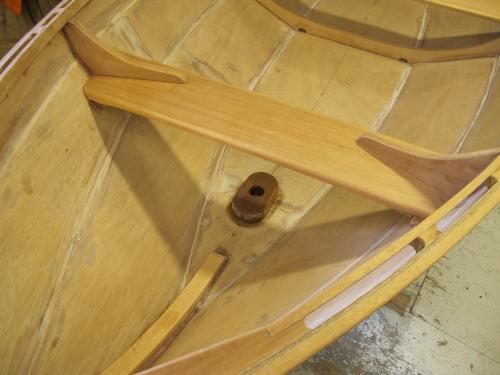 The temporary screws will be removed in the morning. The permanent screws will go in once the hull is turned for finishing. |
|
|
Mark,
To my eye, the mid-frame still looks wrong. Joel should have landed it so it split the mid thwart. Also, the knees and the fwd thwart don't look right the photo. Did you try an axial orientation? Also, I would have planned my scupper blocks so they'd capture the knee rather than interrupt the spacing. Yeah, picky, picky. But that's stuff I worry about. Charlie |
|
|
Charlie,
As you said earlier, a lot of boat building is personal preference. It's not obvious in the photos, but the knees are purposefully positioned. The forward thwart serves as the mast partner. By positioning the knees as Joel White did, the thwart is reinforced across its width and the knees are positioned at 90 degrees to the rail for maximum strength. As for the layout of the knees and how they are positioned within the scuppers, you had to be there. None of the choices were to my liking, but this one offended me least. Sometimes, it's all about finding the right compromise. Finishing up the daggerboard trunk now and I'll be posting more photos on that soon. Mark |
|
|
This post was updated on .
I messed up. The daggerboard trunk was documented except for the installation. Please forgive.
So here we go: 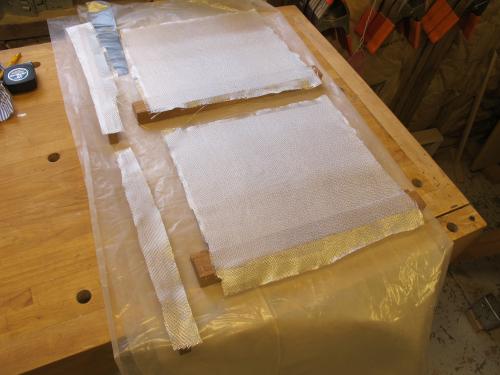 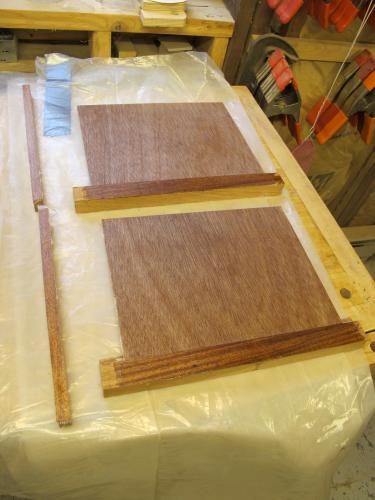 The trunk was formed and then glassed for extra protection. The first photo shows the glass laid upon the inside of the trunk sides and the inside of the trunk ends. The second shows it wetted out with epoxy.  The finished trunk was ready to go into the boat after being wrapped outside with glass then coated in epoxy. This is a strong trunk. I couldn't bear burying more expensive bronze screws in this boat, so I used glass rather than screws. I already had the glass.  The opening was cut and primed with epoxy. This trunk gets set in 5200 for its flexibility and strength. The epoxy coating protects the wood structure. 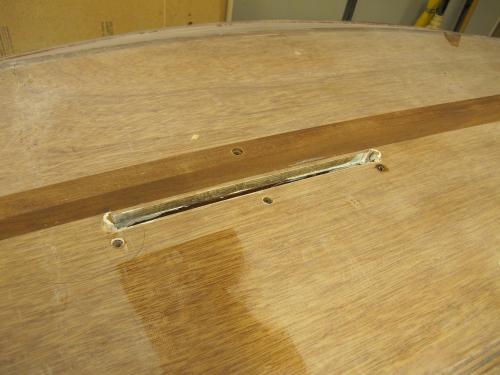 Once the boat is turned, getting ready for the keel, here is the opening for the daggerboard. The white you see is 5200. As you can see, the keel is dry fitted to the hull. 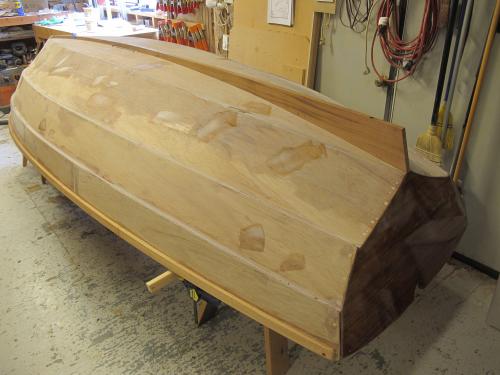  The keel has been dry fitted and fastened temporarily. After these photos were taken, it was removed and will be lapped into the hull shape for a better joint. The keel will be fastened with screws and glued with thickened epoxy. |
|
|
In reply to this post by MarkR
The forward end of the keel was fitted. Then the keel was glued with thickened epoxy and fastened with steel screws temporarily. Bronze fasteners will be fitted for final fastening.
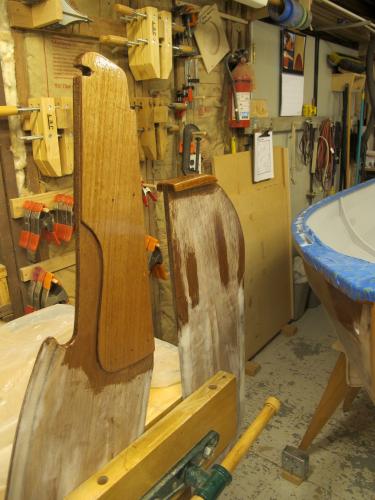
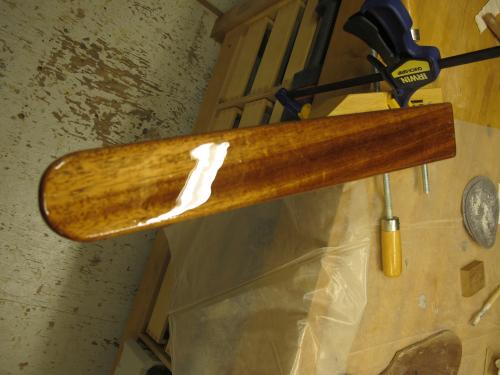
 The bronze screws were fitted and the bungs filled with plugs. Next, the hull was prepared for final coating with epoxy. I was going back and forth about this step. Do I coat with epoxy or just rely on the primer? I watched Geoff Kerr's video on finishing and it convinced me that this step, though time consuming, would probably lead to a better result over time. The exterior of the hull was a rolled and tipped epoxy coating to ward off the devils of the deep blue sea. 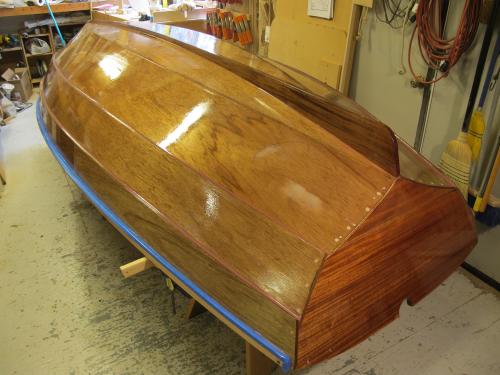 As this was progressing, the daggerboard and rudder were being made. They were cut from 12 mm ply and planed to shape. Some of the planing was less than perfectly smooth so the ugliness was filled with fairing compound prior to final fairing. The parts will be shaped with sandpaper and coated with epoxy then reinforced with fiberglass cloth. 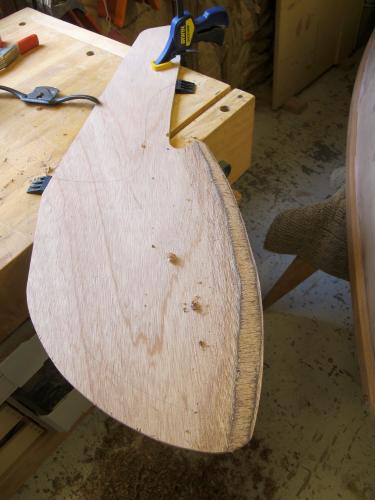 
|
|
|
I've spent the better part of a month working on the boat rather than posting here. So the next couple of posts should catch us up. The daggerboard and rudder as well as daggerboard filler for rowing were made as I worked on getting the boat ready for paint & varnish.
   Lots of fairing of the rudder and daggerboard to make them as clean as I can. Then the leading edges and bottom of both were wrapped in 4 oz glass and epoxy. I don't have photos, but the tiller was made too, and then it was fitted to the rudder. The rudder hanger was fitted to the transom and I had to do a little finagling to get the gudgeons to fit the rudder. Everything is cast and the rudder thickness had to be exactly 7/8". Since this thread is getting rather long, I will start a separate thread on finishing. I'll be trying some water based finishes for priming and painting. |
|
|
Please see the continuation of this thread under the "Finishing the Shellback Dinghy" Thread
|
«
Return to General discussion
|
1 view|%1 views
| Free forum by Nabble | Edit this page |