Rushton Pulling Boat Build
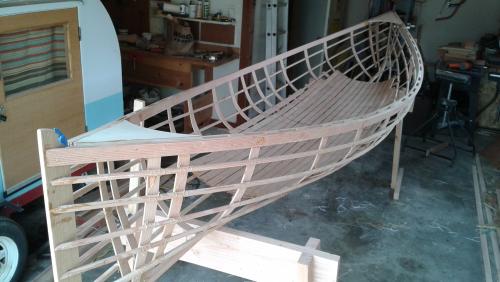
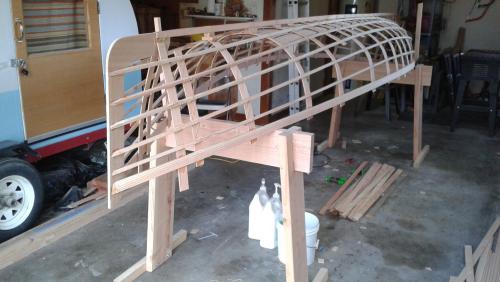 Here is a shot of current progress on a Rushton Pulling Boat I am building in my garage. The boat is skin on frame, length 14' 3", beam 42", design weight 45 pounds. I am going to cover it with ballistic nylon and a polyurethane sealer. The plans are from Dreamcatcher Boats in Vancouver BC. |
|
Welcome to the RW Forum, John. Boat is looking great! If you have any progress photos, please post them. This looks like an interesting project!
Mark |
|
John,
At the shop, you mentioned you were going to scupper the gunnel, though the plans didn't call for it. Kudos on that. Makes for a stronger, better looking boat. With that in place, how are you going to mount the oar sockets? I know. I know. I'm jumping ahead. But I've got an ulterior purpose in mind. Given the narrow, sleek lines of the boat, it ought to be fast under oars, and faster yet if outriggers were used. Also, its lines make it far better suited for our windy, choppy waters than the flat-bottomed boats I typically build, enough so I'm seriously considering building one, given that the plans are dirt cheap at $20 and the cost of materials ought to be low. Glad you found your way to the forum. Post photos, lots of them. Charlie |
|
As far as mounting the oar sockets goes, I plan on filling in the oar socket area on the gunnels with solid wood instead of scupper spacers. I have a set of old screw-on oar sockets that I can use. I think I will start out with those, but nothing prevents me from eventually upgrading. A word about the plans - for $40 you get the plans plus several online videos that walk you through the build process. The videos are most informative, and I highly recommend them. John On 2017-02-06 06:08 PM, Charlie03 [via
RiversWest Forums] wrote:
John, |
|
John,
I scrutinized the photos on his website and watched any of the free videos that showed the rowboat. My bet is the boat's depth won't allow mounting oar sockets on the gunnel. They need to be higher, so grips clear knees on the recovery stroke. Oar socket blocks are easy to fabricate and mount. Also, they become a means to customize a boat, especially when coordinated for figure and color with corner knees, breast hooks, etc., as in the example below. Charlie 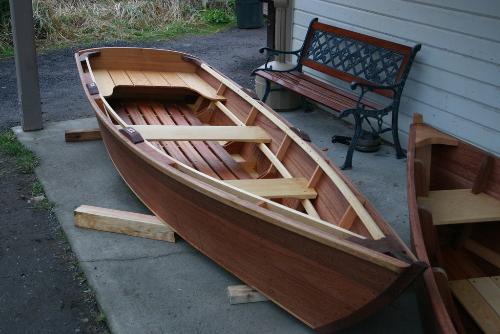 |
|
In reply to this post by JohnR
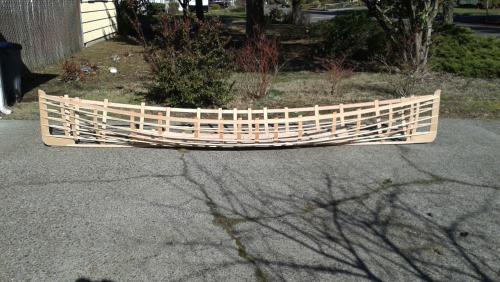 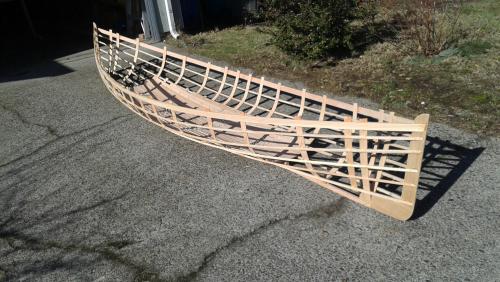 Today I set the hull out on the driveway for a while so I could use my table saw. The floorboards are in place with tie wraps, and I have about 1/4 of them lashed in place. A slight problem - as I lash down the floorboards they want to pull the hull out of shape. So, I am going to go ahead and install the gunwales and breasthooks next. That should stiffen up the boat a bit. Then I'll go back and finish off the floorboards. |
|
John,
Lashing a frame shares similarities with S&G construction. As parts get pulled together, the hull takes its shape. That can work for you, or against you. How thick are the floor boards? Their tendency will be to flatten the rocker and narrow the beam. But if each board were two boards that had been laminated to the curve of the desired rocker, then they couldn't pull the hull out of shape. Alternatively, steam-bend them (or dry-heat bend them) over a mold and then install them. Gorgeous looking boat. Charlie |
 Here is a shot of current progress. The gunwales and breasthooks installed, the floorboard lashings completed. Next comes seats, and perhaps risers for the oarlocks.  Just for fun I got a friend to help me set the boat on my roof racks. It's easy with 2 guys, but the boat is unwieldy to lift with one guy. I might start thinking about finding a small trailer. |
|
John,
Rather than the expense and a hassle of a trailer, given that the finished boat will weigh so little, you might look at the various roof-loaders meant for single persons trying to get a long (or a heavy) boat onto their roof racks by themselves. The simplest ones add extension bars to an exiting roof rack and either load from the side of the car or from its transom. (Yeah, cars don't have 'transoms'. But you know what I mean.) In either system, only one end of the boat is lifted at time, in a four-step process of lift the bow, walk to the stern, lift it, then push the boat and secure it. It's unlikely your car has proper tie-down points for the bow and stern. That's what I'd worry about get installed somehow. Charlie |
|
Thanks Charlie, I'll research roof loaders. I already have a towbar/hitch installed on the car, so perhaps something like the Yakima Drydock might work. John On 2017-03-09 03:14 PM, Charlie03 [via
RiversWest Forums] wrote:
John, |
|
This post was updated on .
John,
The linked video is how I load my boats. I load 'em upside down. But the idea is the same. https://www.youtube.com/watch?v=1GrLiLInZEM What I'm going to move toward is the suction bar shown toward the middle of the next video, which would be easy to make a DIY knock-off. https://www.youtube.com/watch?v=et95QOkzmWY In fact, here's a clever variation. http://www.hobiecat.com/forums/viewtopic.php?f=73&t=31224 Also, just now I found an easy solution to adding front-end tie-down attachment points. I'd make 'em rather than buy 'em. They are placed on either side of the engine compartment whose lid is then closed to leave loops hanging out. It's a fragile solution to creating tie-down points, but better than losing a boat 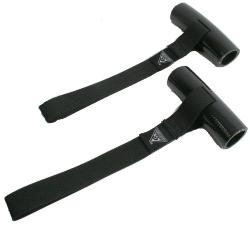 Charlie |
|
In reply to this post by JohnR
Update:
I applied three coats of spar urethane to the woodwork. It took a while - there are a lot of nooks and crannies with this type of construction. Before applying the nylon skin I installed some indoor/outdoor carpet tape to the gunwales and keelson. Then, with the help of a couple of friends, the nylon was stretched over the wood frame, and held in place by the carpet tape. I took pictures of the process, but when when I tried uploading them to this forum they rotated from vertical orientation to horizontal. I chose not to upload them rather than have a bad presentation. I then trimmed and sewed the nylon around the stem and stern. More carpet tape was applied to the gunwales, and the nylon was folded back on itself and trimmed. Here is a shot of the gunwale taken during the fold/trim process. 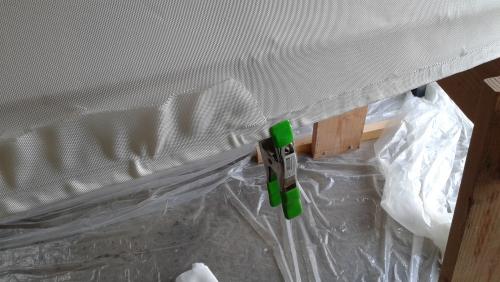 Here is a picture of the finished gunwale and stem. The carpet tape adhesion was less than perfect, so I had to augment it with stainless steel staples. In the end this will be covered by the outwale. 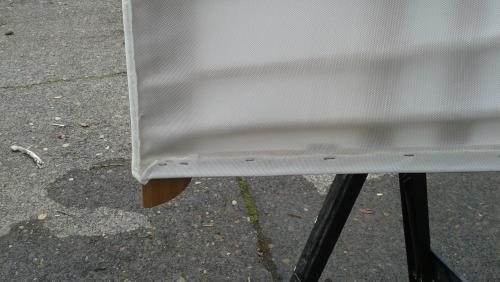 After the skin was installed it was time to shrink it. I moved the boat out to the driveway and hosed it down. Here is a shot of the boat with the nylon skin water saturated. 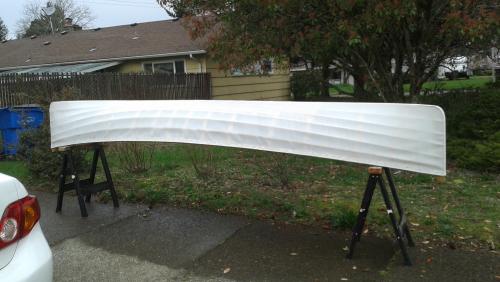 Then I moved the boat back into the garage and put three electric heaters underneath it to dry and shrink the nylon. This worked! Currently, I have applied two coats of polyurethane sealer to the skin. |
|
John,
That skin looked tight even before shrinking it water. Kudos on your careful work. Did wetting it out with polyurethane reintroduce sagging that went away as it dried? Charlie |
|
Yes, upon application of the first coat of water based polyurethane the skin loosened back to it's pre-water-shrunk condition, but tightened up completely after drying.. The second coat only loosened the skin slightly, and then tightened up completely upon drying. John On 2017-04-10 03:54 PM, Charlie03 [via
RiversWest Forums] wrote:
John, |
|
John,
If the water-based polyurethane replicated the same sagging and shrinking cycle as just water alone, then the pure water cycle wasn't necessary, right? Also, how difficult do you think it would have been to have applied the nylon wet and to have stapled it in place wet? What I'm think about is a much smaller boat than the Rushton, say a 6'6" tender, done SOF. Thanks in advance, Charlie |
|
I would still do the water saturation and drying before applying
coatings for three reasons.
First, even when wetted out with poly, the nylon still may have retained some shrinkage from the initial wet/dry cycle. Second, water saturation or using a steam iron to shrink the fabric is recommended by every builder I have read about on the web. Third, from what I've read, different nylons shrink at different rates, based on weave density, drying temperature, and other factors. So, one really does not know how a particular brand/weave/thickness will behave unless you have experience with it. As far as wetting the nylon before application, it's worth considering. Spirit Line Kayaks actually recommends applying the nylon wet if using their 840 Primo nylon. See http://shop.skinboats.com/840-Jr-Ballistic-Nylon-840-jrblorgprim.htm My experience was that, using Spirit Line Kayaks 1050 Ballistic Nylon, stretching the nylon on the frame symmetrically and tightly was every bit as important as the shrink process. A small tender would be an interesting project. It could be built very lightweight. Regards, John On 2017-04-11 07:39 AM, Charlie03 [via
RiversWest Forums] wrote:
John, |
|
John,
Much thanks for pointing out things about applying the fabric I hadn't considered. Your answer is a big help. Randy T is planning to build a 6' 6" SOF tender based on Atkin's 'Katydid'. It will be interesting to show how it turns out. Charlie |
|
I launched the boat at Vancouver Lake on Friday, April 21, 2017! It was a sunny, almost windless morning. This shot is at the State Refuge boat ramp. It was partially flooded, but this worked to my advantage, giving me a large shallow area to check the boat out in the water.
 Here is a shot out on Vancouver Lake. Conditions were perfect.  So, how did the boat perform? - It did not leak, with only 2 coats of polyurethane finish to seal the nylon. - It tracks really well, like it's on rails. It takes some effort to turn it. - It easy to row. I didn't really max out because I ran into some problems with the oarlocks and rowing. I have already modified the oars, but I need to add some foot braces, and possibly raise the oarlock sockets a bit. So, I am happy with the boat. Now I need to design up some foot braces of some type, work on the oarlock sockets, and add some passenger seats. I also need to work on the roof rack loading and unloading method and equipment. I had a friend along this time, but that won't always be the case. John R. |
|
KUDOS. KUDOS. KUDOS to you, John, on an exquisite build. Very inspiring.
You're right. The oarlocks look like they need to be higher if knees are to be cleared on the recovery stroke. Also, for as good as that boat is, you need to lose those Caviness blades and build a proper set of oars, which don't need to be spoons, but must be balanced. Also, rowing will require much less effort if you get used to rowing cross-handed, because doing so is an opportunity to increase leverage --by having more of the oar inbd-- and, thereby, decrease effort. Do you kayak? Borrow some of their tricks and shift your center of balance as you try to make a turn. That should ease things. But if I had to choose between ease of tracking and ease of turning, there'd be no choice. I want arrow-straight tracking, because it frees up the need to focus so intently on a landmark to the stern. Beautiful boat. Superb workmanship. KUDOS! |
|
In reply to this post by JohnR
John,
Congratulations! She's beautiful! Glad you are so happy with it. Mark |
| Free forum by Nabble | Edit this page |

