Point Comfort 23

1234
1234

|
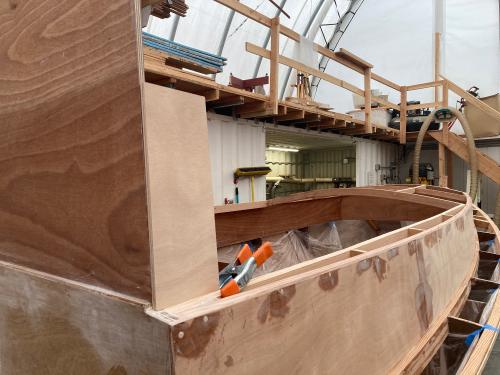
Time to glue and bolt the outer stem. The outer stem was prepared on the bench and the carriage bolt holes and recesses were treated with epoxy for moisture resistance prior to mounting. The longest bolt is 12" - think this portion of the hull is going to be strong!
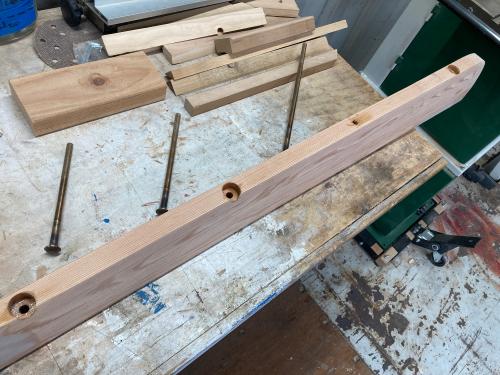 A batch of GelMagic was mixed and the outer stem was coated as was the inner stem area on the hull. I went for plenty of squeeze out as no voids were wanted. The 3/8" bronze carriage bolts were driven with a rubber hammer. 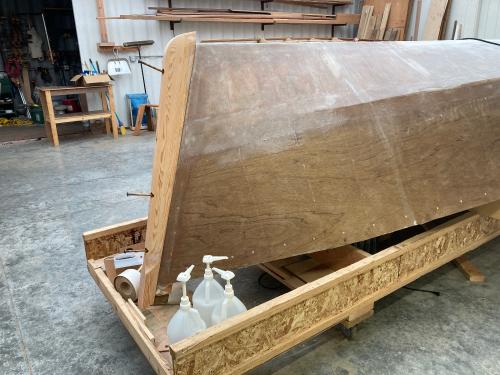 Once the bolts were driven, I climbed under the boat and cinched them up. After extracting myself, the glue was squeegeed into the joints and made smooth. 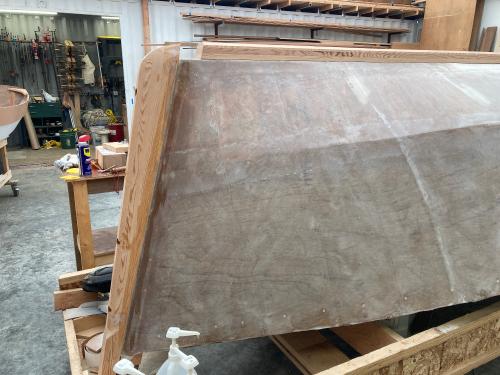 Fit was good and I'm pleased. |
|
|
This post was updated on .
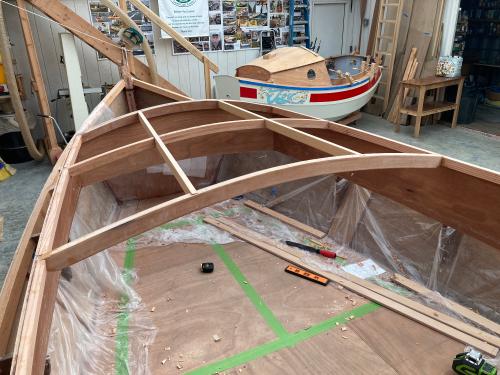
I got another couple of partial days to work on the boat. The keel was next. Everything was final fitted dry, but I agonized over a minor waggle in the keel up forward. Nothing huge, maybe 1/4", but it bothered me. After going back and forth a dozen times in my mind, I finally decided that it was safest to glue it onto the boat and straighten it out on the boat. I really didn't want to fair it on the bench, then figure out that it still wasn't quite right.
So, with the air temp in the 40-45 degrees F range, there was lots of open time on the epoxy. Didn't need to recruit a large crew. I prepped the mating surfaces, wiped them down, then applied GelMagic to the keel (lightly coated) and the keel land on the hull (heavily coated). Bill was in the shop so he donned gloves and helped me move the keel into position. Temporary fasteners were used to attach the keel at the stem, then I was able to go under the boat to fasten the keel along the keelson line. The result was a keel that was glued and screwed into position, ready to clean up on the outside. 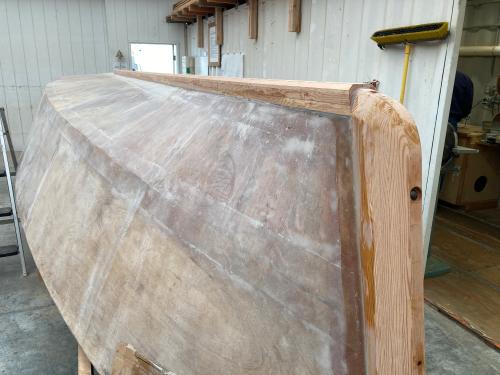 Only two permanent fasteners were in the boat at this point: one 3/8" X 3 1/2" lag screw at the bow and another 3/8" X 3" near the end of the keel. In between, the keel was tied mechanically to the hull with 2 1/2" X 9 temporary screws. Three oil filled radiant heaters were positioned under the boat to get the epoxy up to temperature for curing. 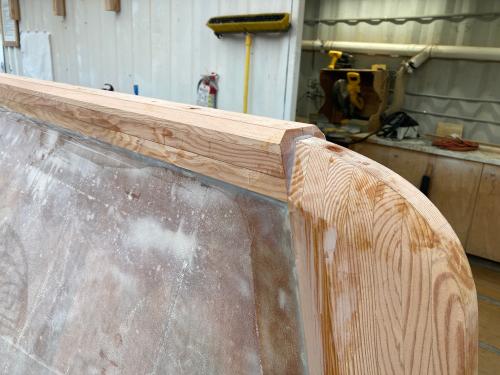 Everything looked good on the outside. The keel will be shaped to blend into the stem once the epoxy has cured. A couple of days later, the temporary screws were removed and #14 X 3 1/2" bronze screws driven in the mid section, with 3/8" bronze lag screws driven into the keel forward and aft. 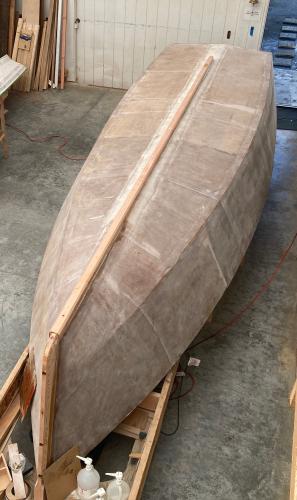 The keel of this boat is over 20' long. At this point, the shaping needs to be done forward and aft, then the joint between keel and hull will get a finished fillet to ease the transition for fiberglass cloth which will be applied over the keel and onto the hull for bonding. We will do that next after some filleting and filling of screw holes. Many thanks to Bill for his help! |
|
|
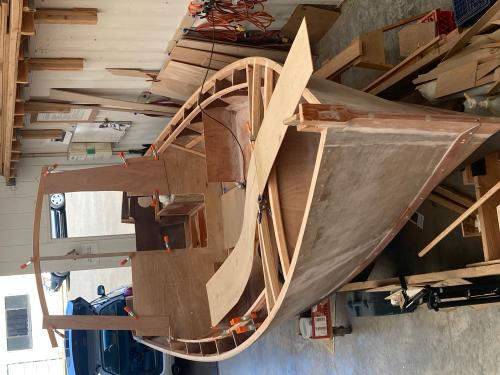
It's been too long between posts, but progress has been made. The keel was shaped on the boat to its final form. I was able to remove most of the waggle from the keel itself using planes and the Rotex sander. The forward end of the keel was shaped to conform to the lower section of the outer stem.
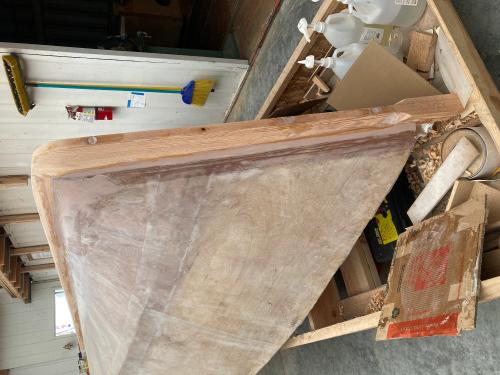 Sorry about the orientation of the image above. The forum doesn't allow for rotation of the image - everything comes in as landscape. Moving on: Then the keel was shaped to a rectangular shape with a soft chamfer on each side. This is a big, durable lamination that will be protected by 1/2" thick UHMW plastic on the bottom. I am preparing for abuse that with any luck, never happens.  After filleting the keel to the hull the keel to hull connection was reinforced with 8" wide 12 oz. Biaxial cloth set in epoxy. The bottom surface got two layers of cloth which should, along with the UHMW shoe protect the keel from abrasion. Then disaster hit in the form of rising temperatures. On the second layup (port side) the tape was applied, epoxy was curing and as I drove home from the shop, the clouds parted and the temperature bounced by 10 degrees. The next morning, I pulled the peel ply to find this: 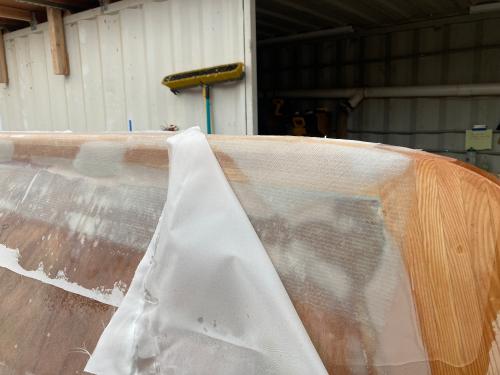 Several big bubbles in the glass. This happens when the temperature rises during the curing process. The fir keel off-gassed as the temperature rose and created these bubbles. Bubbles are good in champagne, but in fiberglass cloth set in epoxy, not so much! Only one thing to do. 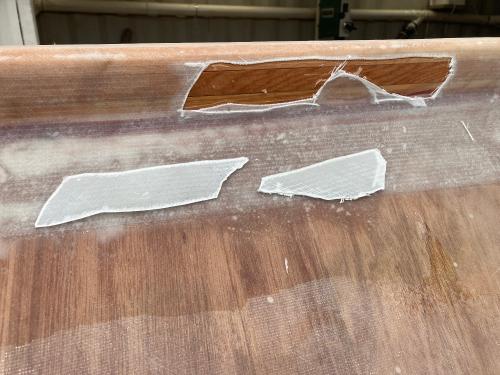 The offending bubbles were first cut out with a sharp utility knife, then sanded to a taper with the ROS. Later, 'patches' of 12 oz glass were made - no bubbles this time - and then sanded and faired into the final shape of the keel. |
|
|
Once the keel was completed, final fairing was in order. Fairing was done to smooth out the fiberglass to hull connections at the keel, the overlaps in glass cloth and any little 'waggle' in the hull.
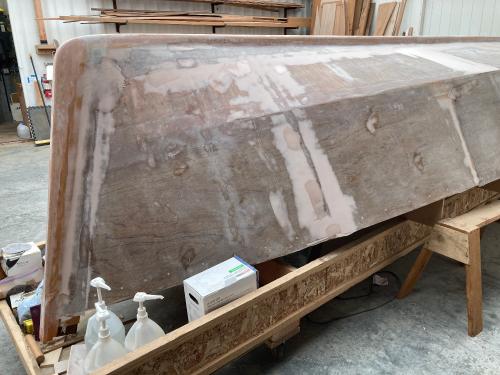 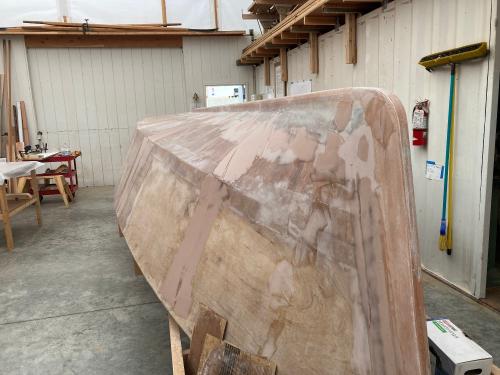 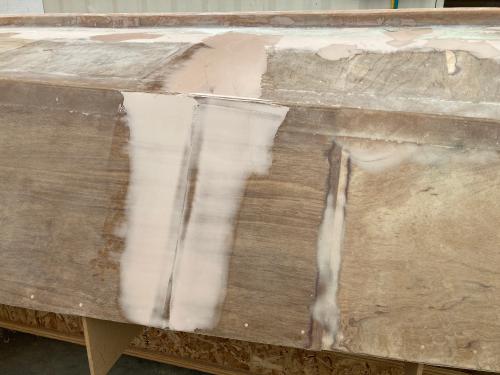 All fairing was done with System 3 QuickFair. Wonderful stuff! After multiple passes, the fairing was to the point of being ready for the spray rails. |
|
|
On to the spray rails! Russ was good enough to help me with this step. First, a big beautiful chunk of Sapele - 8/4 x 5" x 12' was resawed into the blanks for the rails. Then the blanks were scarfed into 23'+ lengths for the spray rails. Once the blanks were planed to dimension, the angles were cut on the tablesaw. Quite a process for these two pieces.
The stem end was cut to angle then fitted with sandpaper and rasp to the contours of the stem. Then the two spray rails were fastened dry to the chine with temporary screws. 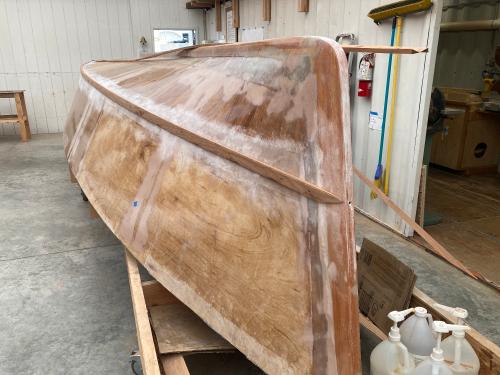 The rails were taped off to keep the cleanup after gluing to a minimum. 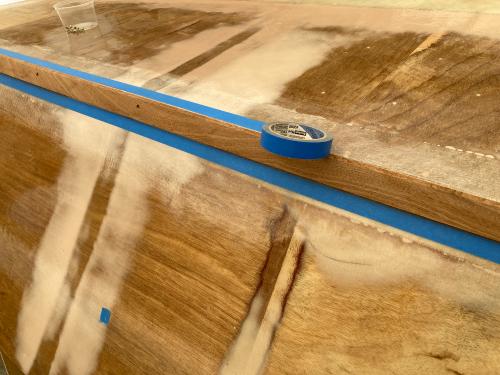 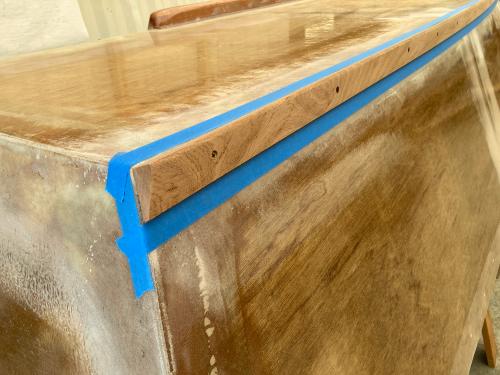 Once the rails were removed for gluing, the tapes were burnished to make sure everything that wasn't in the joint was on the tape, not under it. 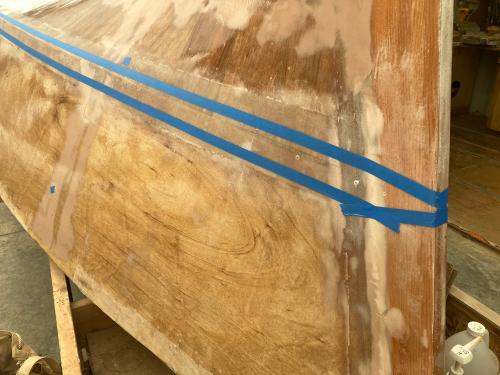 Then the thickened epoxy was applied to both surfaces and fastened with temporary screws. We used cartridges of GelMagic which was fast, convenient and provides a tenacious bond. 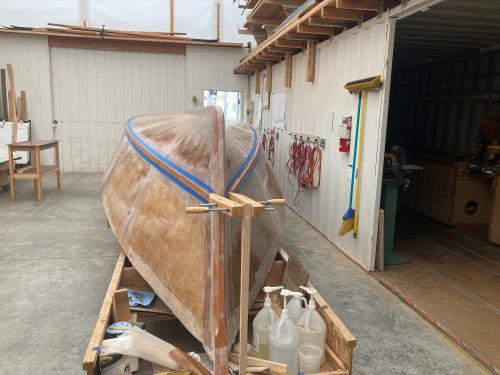 A word here on the process for this particular part of the boat: About two-thirds of these rails are always under water. The rail is not protected by fiberglass, just epoxy, primer and paint. So care was taken to select a very hard and durable wood (Sapele) which is rot resistant. Every precaution was taken to reduce the possibility of water intrusion. Once the GelMagic had set, temporary screws were removed and each screw hole was treated with straight SilverTip epoxy.  The screw holes were then chased with the drill and countersink used for the initial drilling. Permanent silicon bronze 1-1/2" X #10 flat head screws were driven.  The screw holes were then filled with QuikFair and sanded smooth. A finger fillet of filleting mix was applied continuously around the rails. At this point, the spray rails are ready for two coats of epoxy and we're getting ready to paint the bottom! So exciting! |
|
|
The epoxy dried on the spray rails, all of the final sanding was done and the bottom was ready for paint. As I read comments on the TotalProtect barrier coat, several users commented on how difficult it was to sand to a smooth finish. Since I am hoping to achieve a good finish on my topsides paint, I decided to only use the barrier coat under the bottom paint.
So I broke out the laser and started laying out the waterline. This boat will have a cabin that is more involved than what Doug Hylan drew for the original design. So the waterline is modified from the drawings. The laser allowed me to lay the tape line to the green line of the laser. 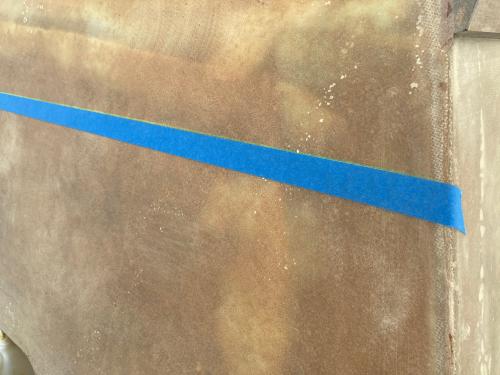 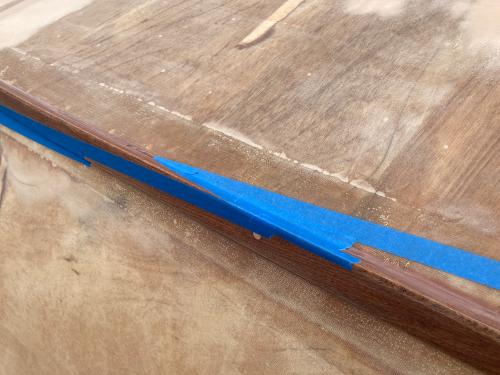 Once the tape line was laid out and burnished, the paper was added to catch drips and the boat was ready to paint. TotalProtect is a two part epoxy formula. The solids separate from the liquid in the paint and so a power mixer was a good thing to have available. Five coats are required to get the film thickness required. The good news is that it is a really easy to work with material. I applied each coat with a 3/16" roller and a brush for inside corners. I found that 9" and 3" rollers were most appropriate for this boat. After five coats over two days, it's looking good. 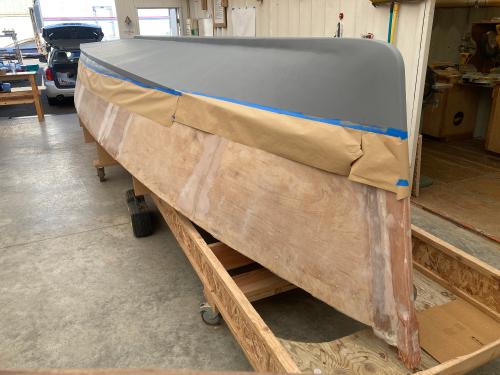 I used Sea Hawk Cukote bottom paint over the barrier coat. Randy T. suggested it as a bottom paint that could be out of the water and not lose its protective properties. That's important to me as I won't be launching for probably at least a year. As I researched bottom paints, my research always had me returning to Cukote. So I ordered a gallon of black from our friends at Sexton's Chandlery. The first coat is thinned by 20%, which was a surprise, but that's what the application instructions said. It was really thin, but still covered nicely. The thinned coat is supposed to give better penetration of the substrate providing better adhesion. Three coats plus an additional coat at the waterline were applied in one day. The temperature rose rapidly after a cool early morning which encouraged drying between coats. 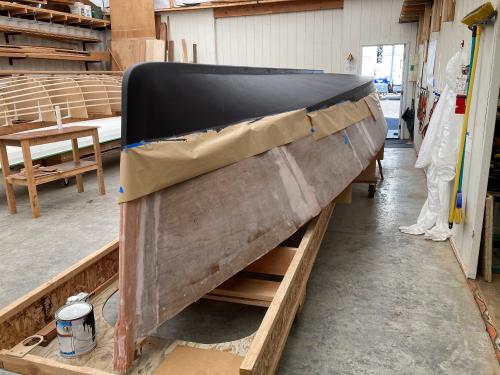 The next day i approached the removal of masking with some trepidation. I assumed that I would have to scribe a line along the masking tape to avoid making a mess of things. I was wrong. Happily. 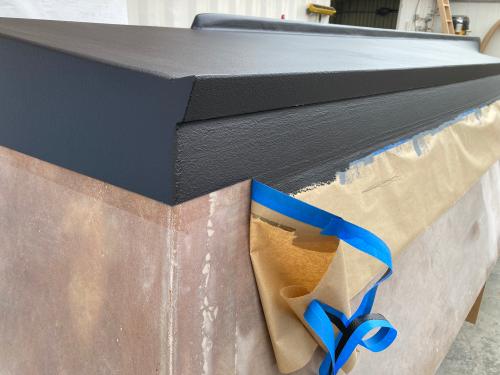 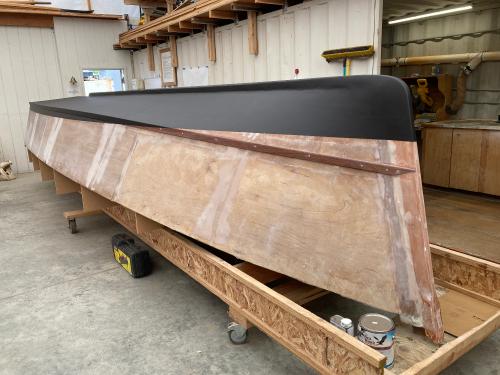 The tape peeled off leaving a clean and crisp line. Amazing: Peeling five coats of barrier coat and four coats of bottom paint with a clean line! The best news is that the hull looks really good. Guess I'd better source that UHMW keel shoe to get ready for roll over! |
|
|
This post was updated on .
Over the last couple of weeks there has been some progress. A transom cradle has been made, leveled and attached to the building frame. This will get a final leveling once the boat is on it. Four of the 2x8 cross members in the building frame have been cushioned with trailer bunk carpet where the keel contacts the frame, and two of those have blocking installed to position the keel along the centerline of the frame once the boat is turned over.
Only two things on the list prior to rolling the boat over: The UHMW protective shoe for the keel and constructing the rolling frame. My nephew, Nate is in the plastics business, so he's sourcing the UHMW for me which is much appreciated. The rolling frame started with a big pile of construction lumber. 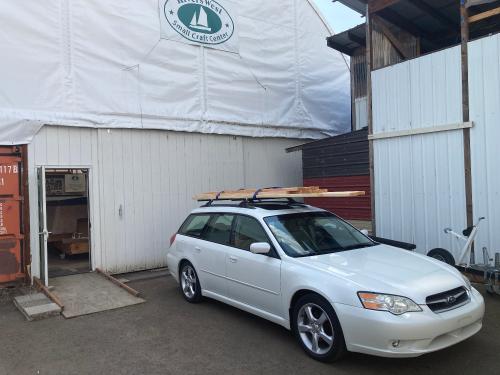 The material was delivered to the shop on the roof racks of the trusty Subaru. Over the course of two days 2x6's were fastened to five of the temporary frames; then uprights were fitted to protect the topsides. These are beveled to fit the angle of the hull and padded with trailer bunk carpeting. The "tops" of these are roughly parallel to the keel both along and in elevation to make the roll-over as drama-free as possible. 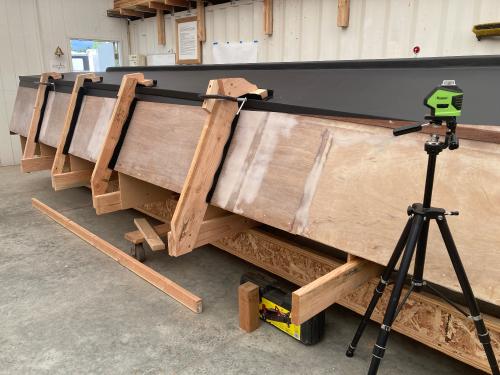 Fitted to the tops of these uprights are 2x4 pads that will support the rolling weight of the boat on the port side chine log. These are padded with bunk carpet. The 2x4x10' on the floor will be fastened to the rolling edge along the chine. A 2x6x12' will tie the 2x6 supports and all of the temporary frames together. All the big stuff is screwed together with 1/4" GRK screws. The connections of the 2x6's nearest lifting points are reinforced with steel 90 degree plates. I didn't get a photo of these installed, but it will be included in the next post. It was good to get all of this done prior to a short trip out of town. Next time we'll be installing the UHMW keel shoe and making final preparations to the rolling frame for the roll over. |
|
|
Once the UHMW shoe was attached to the keel, the rolling frame was completed in anticipation of the big day!
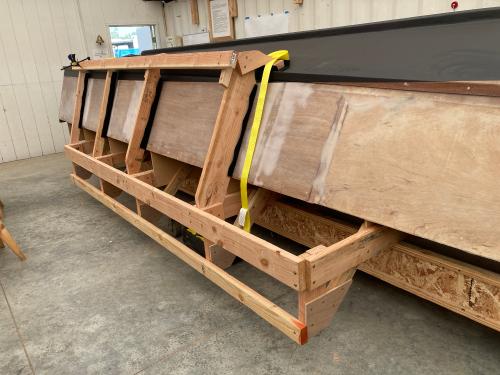 Rolling frame was completed, but I was concerned that the screws into the frame might not hold if something unanticipated happened. In the photo above, I fitted the boat and cradle with straps to provide another method of attachment during the roll. These "suspenders" would function to hold the boat to the cradle no matter what happened.  On the opposite side, pads were made to transfer the stresses to the chine log.  Suspenders were completed and now we were ready to go. First, I talked to Matt - the crane operator. Important guy in this operation - he has the big rig and operates it with finesse. Matt was OK with Wednesday, which was also supposed to be a clear day. I sent out the 'all call' to RiversWesters, friends, fellow boat builders and all interested parties. Roll over day is set! |
|
|
 The boat on its cradle is poised at the door, ready for the ramps to the parking area. The aft cradle is seen under the transom, ready for the boat once it is turned over. Once it was rolled out, the crane lifted the boat and cradle off of the building frame and onto the blacktop. 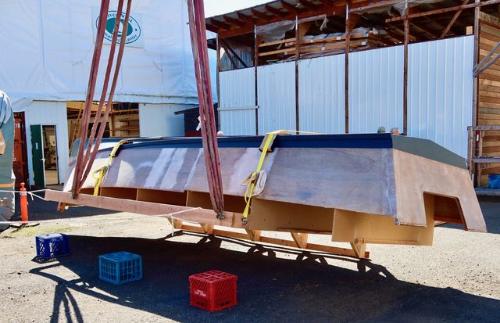 The milk crates supported the starboard side prior to beginning the roll. Two lines are attached to the starboard frame to control the shift of center of gravity on the roll over. Two people were on each line and their job was not to take any of the weight of the boat, but to provide a 'shock absorber' for the roll. 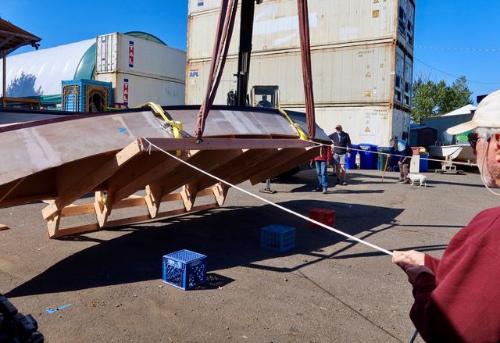 Matt slowly lifted the boat while the control lines were payed out. 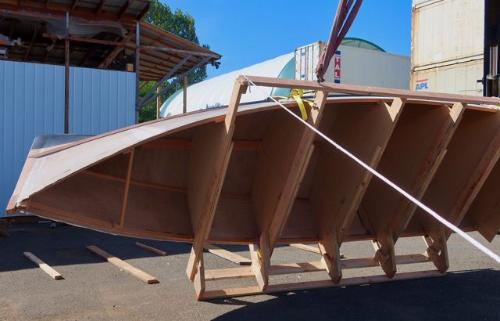 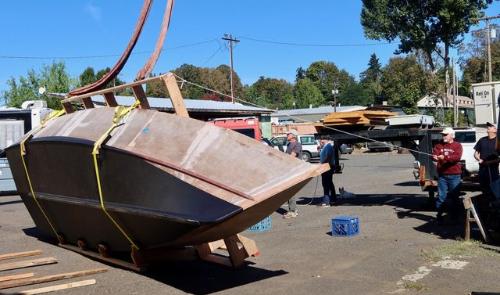 The roll continued until the boat came to rest on the 'flat' of the cradle. 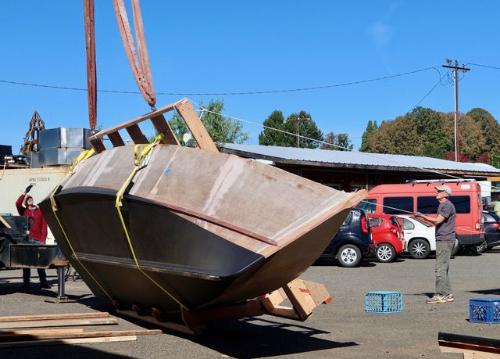 Matt was able to gently pull the boat over center with the crane. Amazing work! The 2X planks were there to catch the keel and keep it off the asphalt. Once the boat was down, it was re-rigged so the crane could lift it vertically and place it carefully back onto the cradle frame. 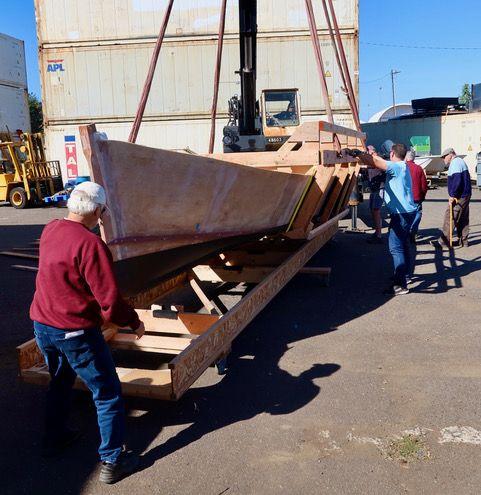 The cradle worked perfectly and the boat was settled onto it, ready to go back into the shop. We all broke for a lunch of pizza and soft drinks. Lots of laughs and good conversation. Thanks to Meg for picking up and delivering the goods! 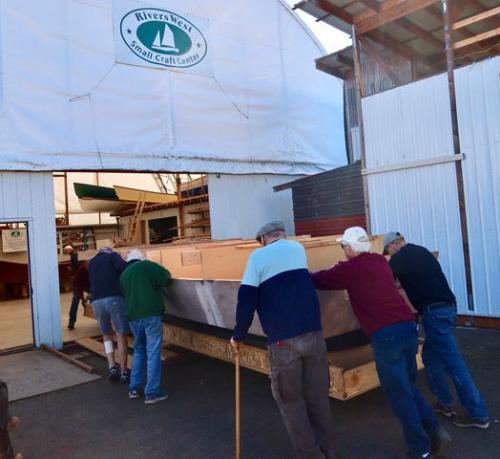 All hands were needed to get the boat back up the ramps. Best comment of the day: "That was boring." Thanks, Randy. Just the way we like it! To see a short video of the turn over, go to the RiversWest YouTube channel here: https://www.youtube.com/watch?v=41e9d_c9eYY |
|
|
It's been a while since updating. Sorry about that - been kind of busy working on the boat. Once the boat was right side up, work was started getting various interior components fabricated and installed. This work started with fabricating bulkhead 22 which forms the splash well. Luckily, temporary frame 22 was available as a template.
 The permanent piece was cut from 18mm ply. Openings were cut for the battery compartments port and starboard, and for the center opening which will house bilge pumps, fuel filter, etc. 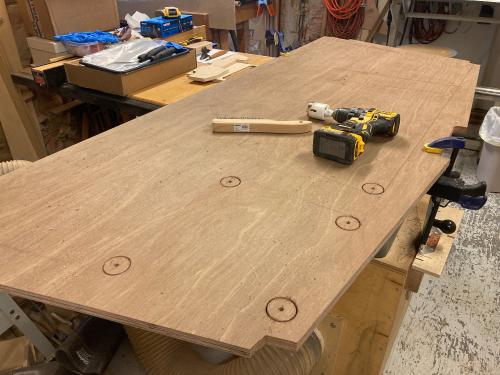 The part was finished on the bench, fiberglassed on both sides and fitted to position.  Once glued and cleated onto position, the 18 mm side panels were cut and fitted. 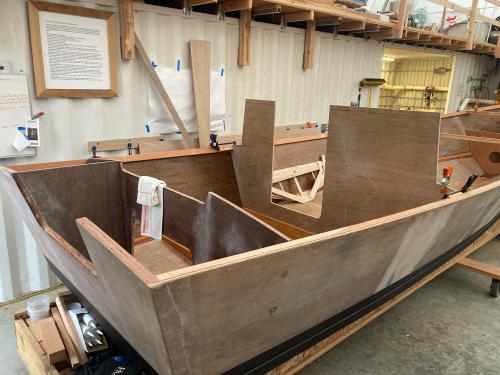 This will be finished up in a while, but now we will move on to fitting the floor beams. |
|
|
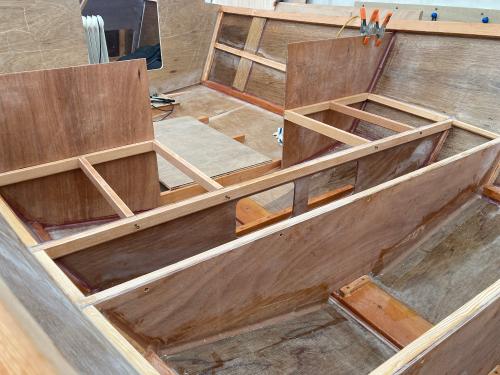
Floor beams are next up on the agenda. Aft beams were made first as the aft floor beam is the attachment point for bulkhead 22 and the forward beam provides the attachment point for bulkhead 16 + 6". These are made of 5/4 CVG Fir and placed on about 16" centers.
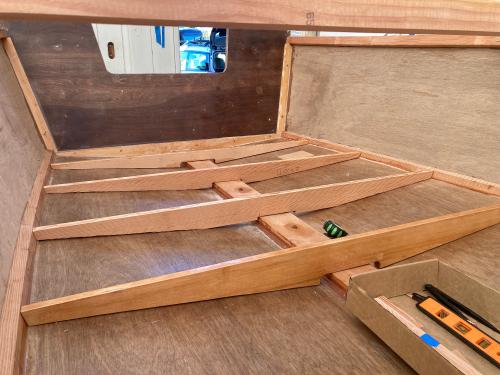 The parts were made, coated with 2 coats of neat epoxy and then sanded smooth for primer. 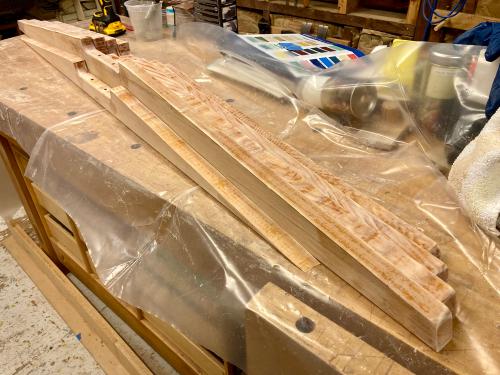 Forward (cabin) floor beams were fitted next. These are shorter as the furniture will provide support near the chines. These beams provide support to the hull in the central area near the keel while supporting the cabin sole. These are being spiled to fit.  The fitted beams are ready to screw and glue into the hull. 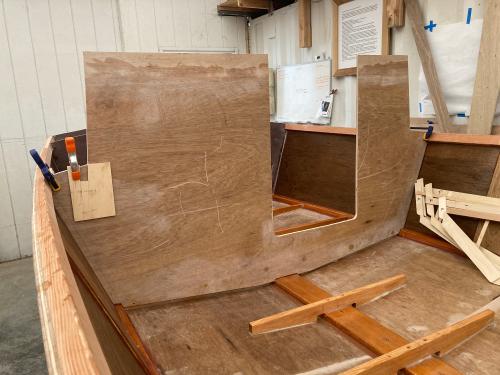 The beams are glued into the structure with thickened epoxy and fastened to the keelson with temporary screws. Once the epoxy cures, the temporary screws will be removed and replaced with #14 bronze screws. |
|
|
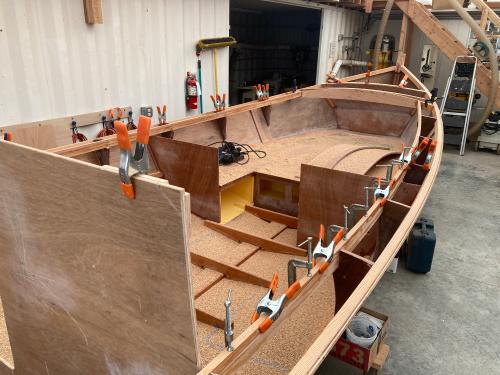
As the floor beams were fitted, bulkhead 16 + 6" was fitted and cut with the help of my friend Jerry. In between the fitting and fabricating, I had removed a cross brace that positioned the chines. To my surprise, the boat relaxed outward at the chine. So for final gluing/fitting a Spanish windlass was fitted between the chines to draw them into position.
 The lower bulkhead was glued with thickened epoxy and cleated/glued into place.  There is another floor timber on the cabin side of this bulkhead that will be fitted a little bit later. It's been made, but needs a final position. It will go in, I promise. |
|
|
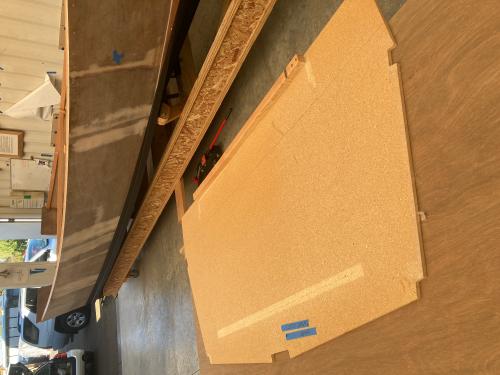
Moving forward, the lower section of bulkhead 3 + 3" was templated. The template defines the outline of this part in its simplest form which is then finally fitted to the hull. This will be made of 12 mm Okume, glassed both sides. This 2 piece bulkhead supports the anchor deck and separates the cabin from the forward floatation compartment. Sorry: this photo is 90 degrees out, but it shows the templating:
 The template was used to cut the part, which was then glassed on both sides. 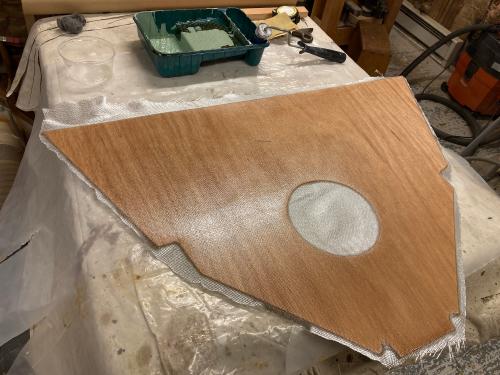 The bulkhead was fitted into the boat and cleated into final position. 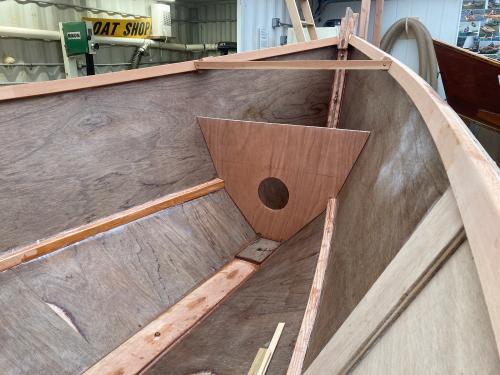 Deck beams were laminated using CVG Fir. Two of these were made, one for this bulkhead and another for the forward trunk cabin bulkhead. 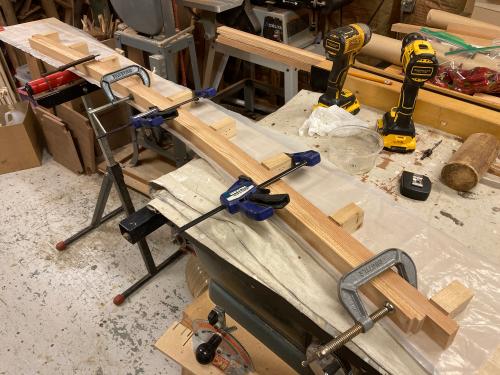 Once the lower section was glued into place, the upper portion was fitted and cut to final fit. The joint between the two sections was fiberglassed both sides for reinforcement. A substantial 1" cleat was used to glue and screw the upper portion into place. Then the deck beam was notched into the chine and glued into place. This assembly will be shaped to final form to accept the forward deck. 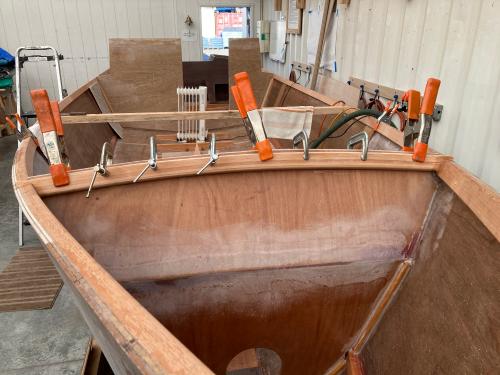 The next thing on the agenda is creating the bulkheads for the forward berth flat. These bulkheads reinforce the hull while supporting the berth flat. Watch this space. |
|
|
The berth flat bulkheads reinforce the forward section of the hull and support the berth flat. The areas between them will provide storage for lightweight items that are not regularly used. They are constructed of 6mm Okume ply, glassed both sides; topsides and keelson joints are reinforced with fir cleats and the bottom joints are filleted and fiberglassed both sides. To make these, they are first templated by using scrap ply and door skins ripped to 2"-3" wide and then cut and hot glued to shape.
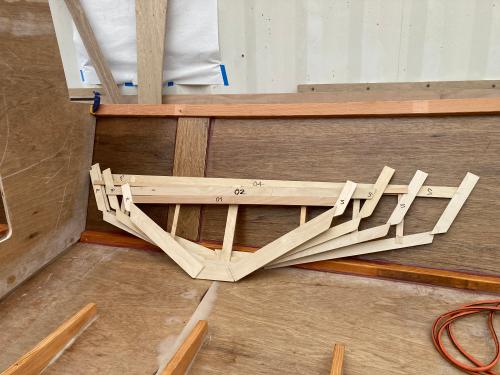 After cutting and fitting the panels, they were glassed and filled on both sides. 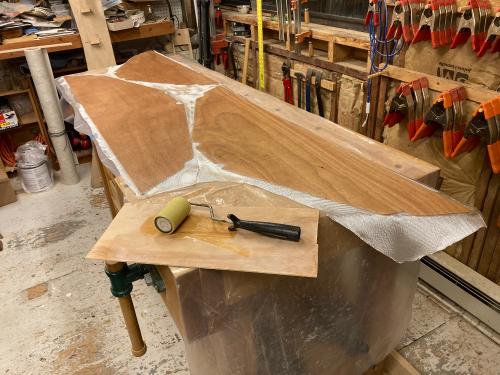 After trimming off the glass, the parts were sanded and ready to install. The bulkheads were glued into place prior to filleting. The radiant heater is used to bring the parts up to temperature so the epoxy will cure. This area of the hull was tented with a tarp and shipping blankets to contain the heat. 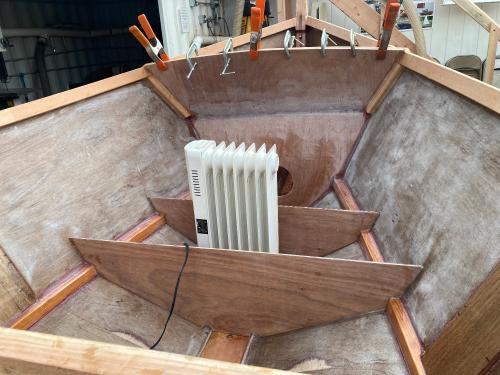 The area between the fourth and fifth bulkheads will provide two stuff compartments. The two openings in this part were templated then cut with a router.  The berth flat bulkheads have been glued in place and only #5 still needs filleting. 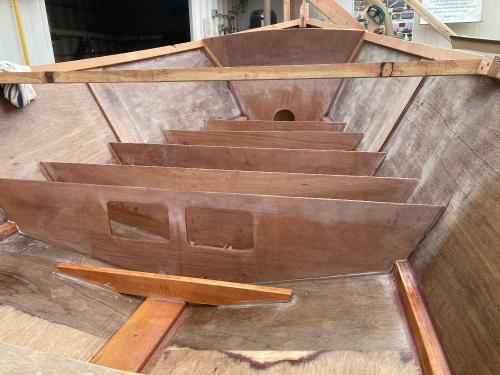 A 1" X 1 1/4" cleat will be glued and screwed to the top of each bulkhead. This piece finishes the beam structure of the bulkhead and provides a surface to attach the berth flat. A stringer will be glued and screwed at the perimeter of the berth for a continuous connection. The center section of the berth will be removable to allow access to the storage areas. |
|
|
It's been a while since I've posted, but the boat has been progressing. So in the next few posts I will try to bring you up to date with a "Cliff Notes" series of postings. Here we go: In the last post we were working on the bulkheads that form the berth flat. Work continued with additional framing that forms the two footwells for the pilot's and passenger seats.
 Once all of the framing was finished up and top cleats added to the bulkheads, the bilge and lockers were painted with TotalBoat epoxy bilge paint.  This worked great, but a respirator is mandatory. Nasty stuff! With the epoxy dry, the edges of the berth flat were fitted. These are 9mm Okume with 6 ounce glass on both sides. 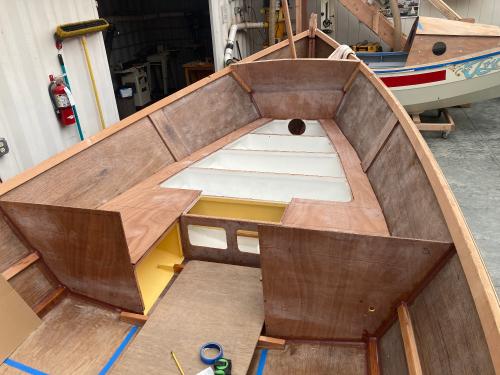 These were glued and screwed to the bulkheads. In the photo above, the lockers have been primed and painted yellow. 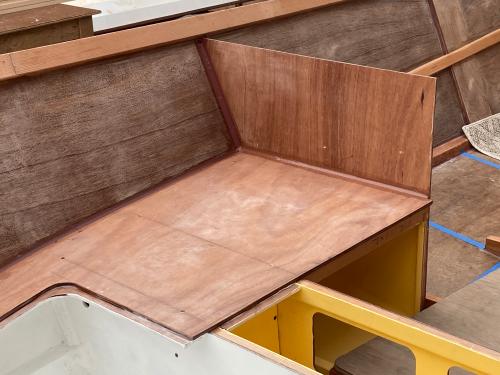 After drying these were filleted into the hull. Later these were taped to provide a structural fillet. These are stiffening structures for the hull. |
|
|
We will move quickly through some pretty big structures. The photo below shows fitting the splash well components and the aft cabin bulkhead that have been fitted into the boat.
 The cockpit lockers were fitted. This took some work. The two curved panels were made in two different laminations. The port side was made of two laminations of 4mm Sapele plywood. The Starboard side was made of three layers of 1/8" mahogany. Thank you Randy T. for sacrificing enough of this material from your stash! 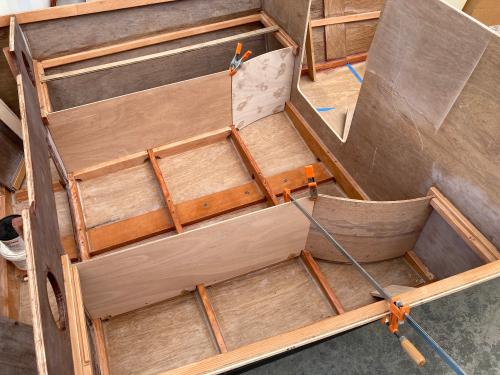 These were glued in place, filleted and the top edge reinforcement glued and screwed into place. A removable bulkhead will be fitted between the aft gas tank locker and the lockers in front of them. 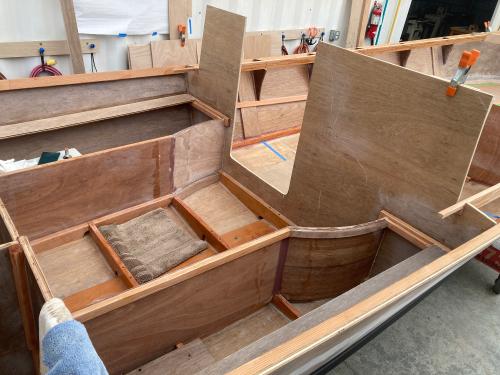 Next, we'll move on to framing of the side decks. |
|
|
This post was updated on .
The next little piece of this big puzzle are the side deck stringers which also form the attachment point for the trunk cabin sides. These are 3/4" x about 2 1/4". The full size stringer would go around the sweep of the curve in plan (3/4" dimension) but not in elevation. It was decided to laminate these from 3 pieces, vertically. They are angled inward by 5 degrees as the trunk cabin sides are angled 5 degrees.
 Two of the laminations were first glued and screwed into place. The third piece was added once the first two dried. As with the rest of the boat, these parts were glued using System 3 Gel Magic. I'm really liking using this product. A consistent mix makes it really easy to use. 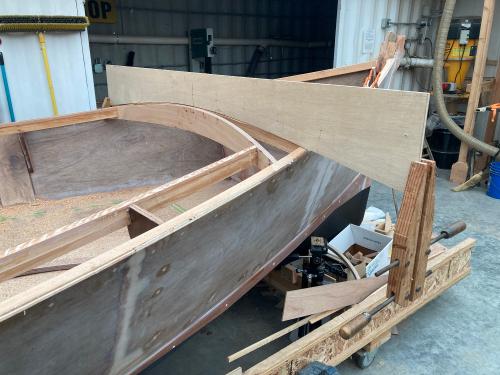 Deck beams were faired using a deck crown template. The decks have a crown of 5" over 8'. Once the longitudinal deck stringers were installed and faired, the trunk cabin sides were mocked up using door skins. The photo below shows an early mock-up. The height was reduced about 1.5" from what is shown here. 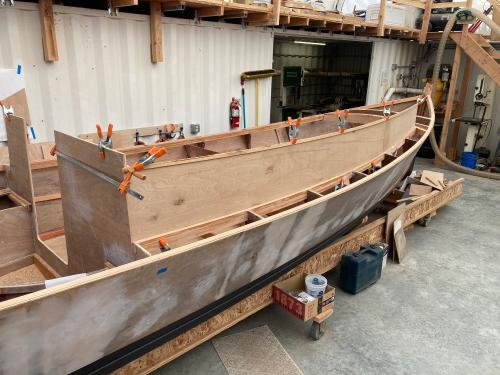 The trunk cabin sides were scarfed from 9mm Okume using the template from the mock-up as a pattern. The photo below shows the final panels clamped into place to get a final fitting. 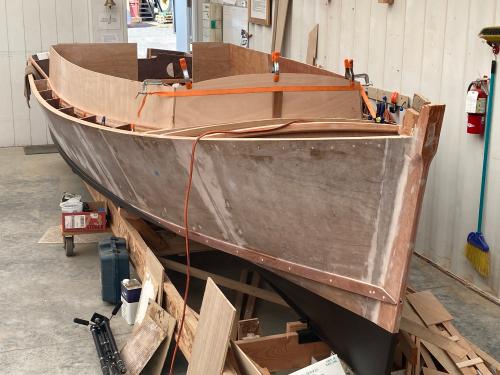 Next, the upper portion of the main cabin aft bulkhead will be made and fitted. Once that is done, the trunk cabin will be glued into place and we can start fitting more deck beams! Next time. |
|
|
This post was updated on .
A simple mock-up of the aft cabin bulkhead was clamped up from scraps and one laminated beam to show a cabin with 6' standing headroom in the center of the cabin. Looks really tall right now, but the scaled sketches look better. I will proceed with making the upper section from 12mm Okume. Sorry about the orientation of this photo. I forgot about the forum's dislike of vertical orientation.
 The upper bulkhead is fiberglassed both sides prior to installation. 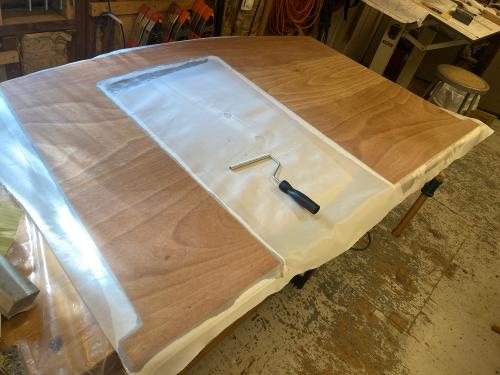 This part has to be installed prior to fastening the trunk cabin sides to the bulkhead. The overlap of the lower and upper sections forms a stringer to fasten the trunk cabin sides. 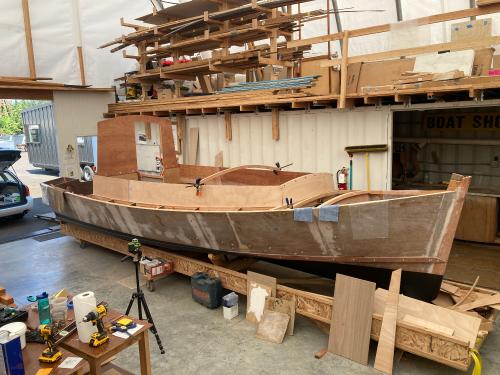 The trunk cabin sides and forward bulkhead were glued and fastened to the deck framing and the aft cabin bulkhead. Temporary fasteners were used to fasten this structure. I'll come back later, remove the temp screws and fasten with bronze. |
|
|
So I've been working on laminated beams and other wonderful stuff for a while in my shop at home. Basically, because they fit! It's a small shop. Today I made some decisions, fitted some parts, made some joints and got everything ready for tomorrow's work which will be to glue all of this stuff in place to make the structure for the forward trunk cabin. Here was the initial dry fitting of the components. This might have been the most challenging set of joints in the boat so far. Lots of jigs and jags, compound angles that had to be done by hand. Thank goodness we are gluing with epoxy and its love of adequate room to bond.
 Now at this point, the starboard side of the trunk cabin had been planed fair, so I had a clue as to how it would work. Port I haven't touched. But I have a sense of it. I am liking the look of the boat at this point. 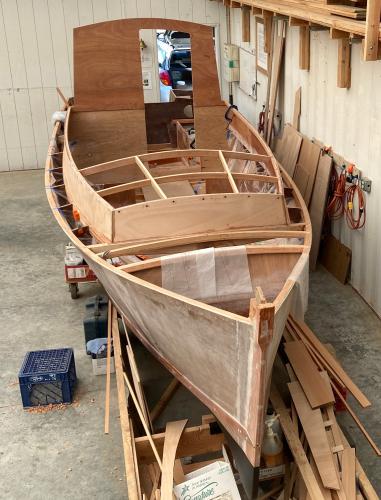 Earlier, I made some straight and true beams for the longitudinal support. They were laminated CVG Fir (If you've been paying attention, this is a re-occurring theme). Wrapped in fiberglass cloth and bedded in epoxy. This process is time consuming but makes a strong and lightweight structural element.   This process allows a common boat builder to introduce reasonably stiff and strong structural elements into a boat without breaking the bank. This is the big progress point for now. I'm getting excited about this project looking more and more like a boat. |
|
|
The sides of the house were fitted by first confirming that the 9mm side panel fitted properly to the aft cabin bulkhead and the lower frame.
 Then sticks were used to show the shape of the side. The laser was used to develop the top edge. The cabin sides are angled inward at 5 degrees, the windshield angles back at 4 degrees, so none of these are 90 degree angles. The 9mm sides were cut based upon the template developed in the previous operation. Only minor fitting was required. While they were there, they were trued and the windshield panels were fitted. I really struggled with the framing for the windshield panels: There are multiple angles involved and I was having a heck of a time trying to figure out the framing. Eventually I decided to treat the windshield panels as stitch and glue construction. 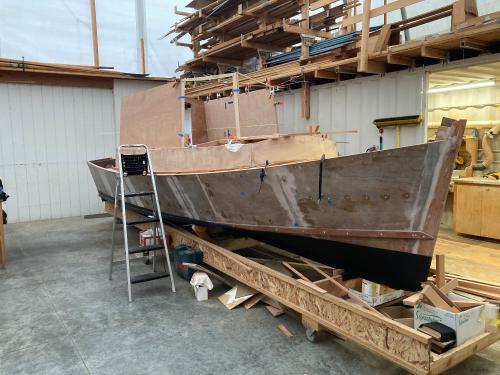 The photo below shows them dry fitted into the openings. The framing supports will be fitted later. Once fitted, all of the panels were removed for fiberglass. 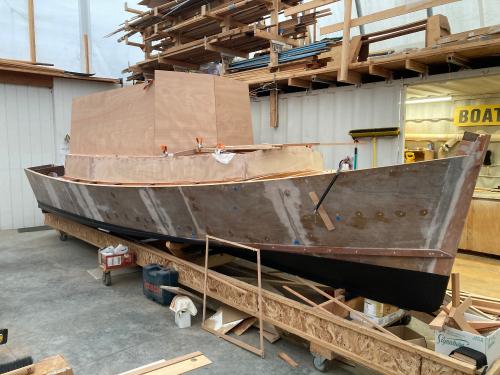 Once the panels were fiberglassed on both sides, they were fitted to the boat, glued using Gel Magic and screwed into place using temporary screws. The cartridges of Gel Magic really make it easy to apply the epoxy to these long glue joints. |
«
Return to General discussion
|
1 view|%1 views
| Free forum by Nabble | Edit this page |