Point Comfort 23

1234
1234

|
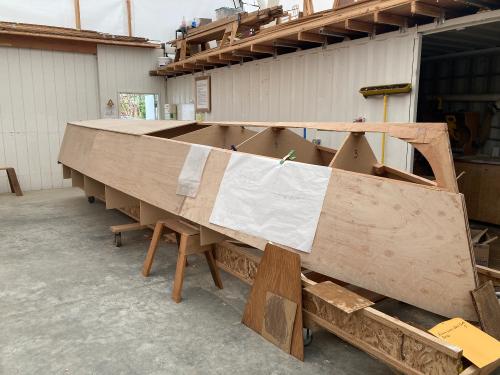
This morning we glued the aft panels to the hull. Not really any photos that show anything. Mitch, Bill & Charlie showed up for a gluing session for this part of the hull. Every one of them was needed! These aft, below waterline panels are roughly 12' long and just a little less than 3' for each half. We applied the GelMagic from tubes then spread the thickened epoxy from edge to edge on the chines and keelson. Then three of us, one in the mid-point of the panel, one at each end, positioned the panels for fastening. Registration marks were used to get the panels just right for fastening.
This went so smoothly and efficiently that my projected 2-3 hours ended up being 1 1/2 hours. A really good glue up! Thanks to Charlie, Bill & Mitch! You guys are wonderful! On the next installment, the landed 1/2" panels will be routed to allow a lap joint of the forward 2 x 1/4" panels as we go forward with below the waterline planking. |
|
|
Been gone for a while. Traveling - good times! Here's how the aft panels looked after the glue up. Right where they should be.
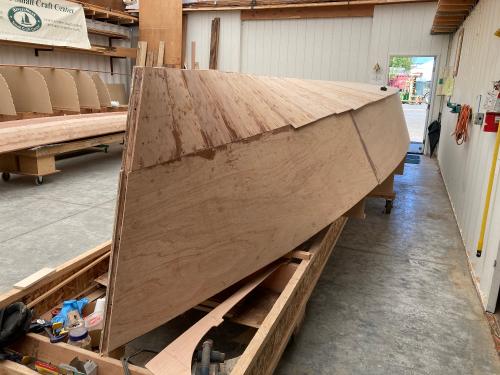
 Forward of these aft 12mm panels we switch to two layers of 6mm planking. So we routed a 4" wide section to half of the 12mm thickness. This provides the glued lap for the second layer of planking. 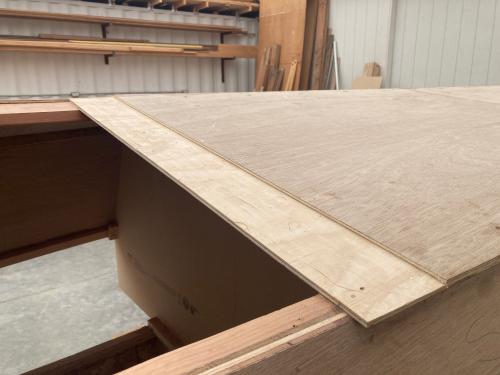 Then the 6mm planking is butted to the lap as shown below. The first layer of 6mm planking is shown prior to gluing. This first section is about 4' wide along the bottom. The second layer will overlap the first layers providing a very strong laminated structure. 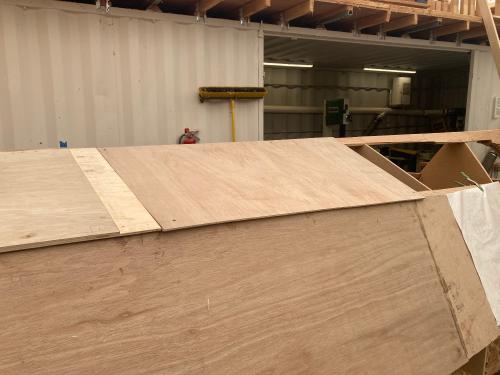 Next time we will move forward where the shape of the boat is very severe and the twist in the plywood is quite extreme in places. Excitement follows! |
|
|
I just realized that I'm using both imperial and metric sizes in my descriptions. Please forgive. As a reference 6mm is about 1/4". 12MM is about 1/2". Both are just shy of the Imperial measurement, but close. Length, stations and beam is Imperial on this boat. Sorry for any confusion.
|
|
|
This post was updated on .
Mark,
If you start dimensioning the boat in terms of 'cubits' and 'barleycorns', then explantions might be needed. (About 18" inches and 1/3" of an inch, respectively.) Otherwise, it should be assumed that the reader should know that 1 mm equals roughly 0.040" and that he/she can do the muliplication. Hence, 6mm ply is 0.240", or roughly 0.010" less than 1/4". Etc. (IMHO, 'natch.) Charlie |
|
|
This post was updated on .
The whole boat is specified by Doug Hyland in Imperial units. Of course, all of our marine ply is metric. So...
On to the planking of the forward section of the bottom. Lots of twist in this area, so the panels get more narrow as they go forward. After the initial 4' - 6mm section, the panels dropped to 24", then 12", 9" and eventually only about 7". Each plank of the first layer was dry fitted until the complete forefoot had one layer of 6mm ply.  There is one point where the bottom planking goes from overlapping the side planking to butting into it. It made that plank a little harder to fit. But just a little patience and it turned out pretty well. 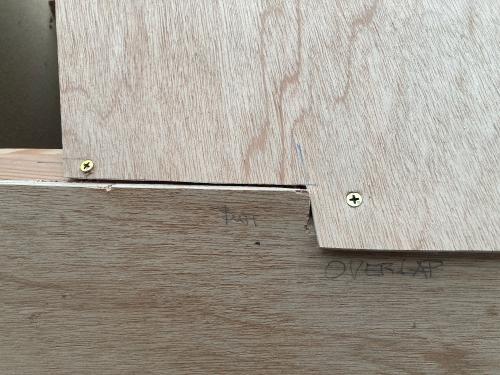 The result is a first glimpse of the beautiful final shape of the forefoot of the boat. Really nice! 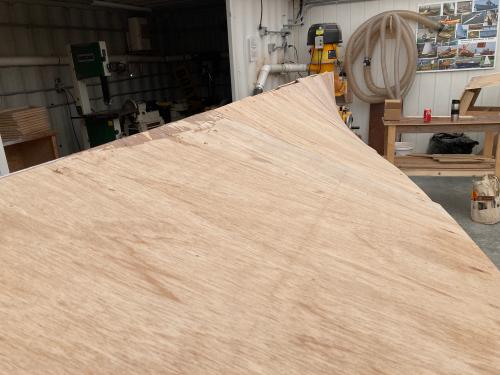 After numbering each panel and providing registration marks from one panel to the next, we removed all of these to get ready for gluing the first layer to the keelson, chine and inner stem.  This is the sixth panel from the stern, Starboard side. This building sequence is a slight departure from the designer's instructions which had the two layers going on at the same time. Since I'm doing this part of the build solo, I elected to do the first layer completely, before even cutting and fitting the second layer. Simple and less stressful. |
|
|
No new photos this time. The second layer of bottom planking is fitted and glued. Panels 3 & 4, port and starboard were glued up on Thursday. We've been having very warm weather, so by about 10:30 it was time to quit as I was losing open time for the epoxy.
Friday morning I got up early to get the most out of the morning. To my delight, the sky was overcast and the air was cool. A big batch of coastal air and clouds had blown in. A good day for epoxy! The entire forward section was glued up well before noon. On Sunday, I'll go out and pull the screws. Then Meg & I are off for a little vacation. By the time we get back, it will be cured and ready to finish off the hull panels. - Mark |
|
|
In reply to this post by MarkR
It's been a blast seeing your progress, so keep 'em coming and keep doing your thing. Can't wait to see what you'll share next!
|
|
|
This post was updated on .
We're back from vacation and have been able to get a little time work on the boat. Prior to leaving, the second layer of planking was completed on the forward section below the chine. At the last moment I was able to pull the screws and leave the epoxy to cure for a couple of weeks.
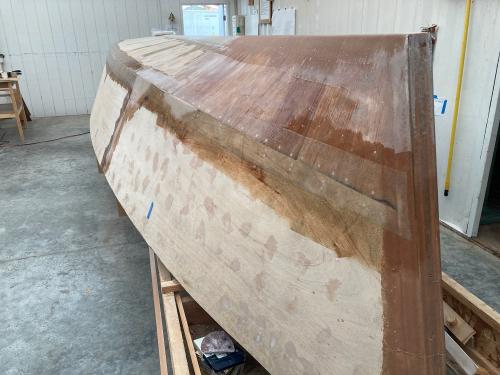
 The photo above is what I came back to, all cured and ready to be trimmed. The overlaps were trimmed with the jigsaw, stopping to adjust the angle every three or four feet. Then the power plane came out and I was able to trim the overlaps to almost flush before finishing with #4 & #5 Stanleys. The planking edges are not perfect between chine and keelson, so the Rotex ROS came out with a sixty grit disc. Several hours at the controls left me feeling like I'd had a really good full body workout! 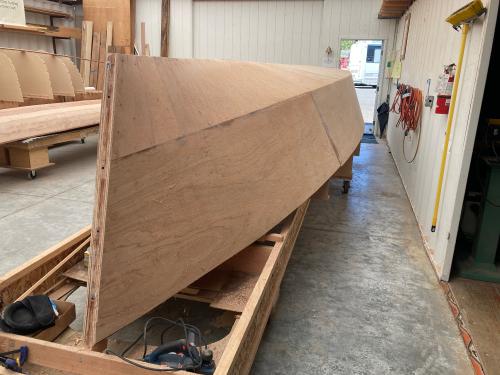 It's looking more and more like a proper boat. I went out yesterday to do some layout work but the batteries in the laser were dead. I decided to do some more sanding to get the hull rough faired. Probably one more session with the ROS and we'll be ready for some fairing and long boarding prior to glass. I like to get the hull faired as much as possible under the fiberglass. 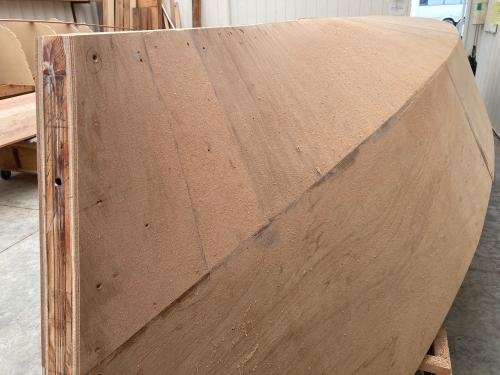 All for now. Next up will be laying out and cutting the keel land, doing the tapes for the "Payson Scarfs" at the butted panels, then a bunch of fairing. A word on "Payson Scarfs" - more properly, a butt joint. This boat is built with butt blocks joining the topsides panels. This is done for the practical reason that the topside needs nearly the full length of 3 sheets of plywood. A true scarf joint would require an additional sheet of plywood. Dynamite Payson came up with a method of joining panels using a butt joint with fiberglass tapes on both sides. Fast and very strong, but they often read through the finish. A variation of this method is to cut or grind a hollow in the panel where the tape goes. That's the method that I'll be using on the PC 23. Butt blocks on the inside, hollow grind with glass tape on the outside. It should allow for fairing that joint flat and fair. |
|
|
This post was updated on .
OK, so we've been back at work for some time, just not posting. So here we go: This time we'll be using the laser to layout the keel land. OK - sorry. This is an older, vertical photo. If you've been following along, the forum somehow doesn't like vertical photos. So, this photo is 90 degrees out.
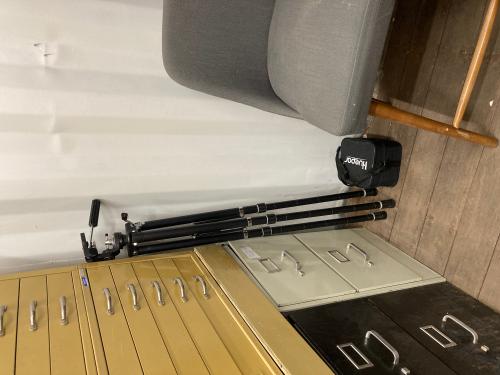 The laser is a new one. One of the green lasers that are brighter than the red ones, so more visible in high light environments like the RiversWest shop. Sturdy tripod is a must. Used to use this for a 2 1/4" film camera. Old! Sturdy!  The laser is set up exactly on the centerline of the boat. 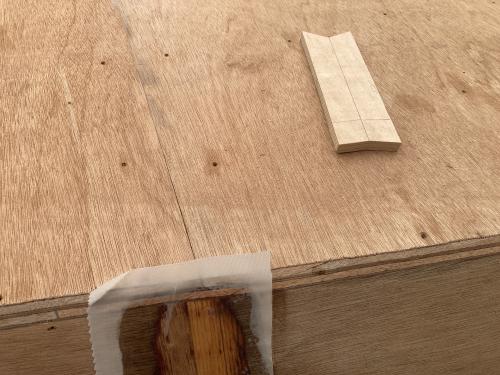 The jig in the foreground is exactly the width of the keel land. It's angled to match the bottom of the boat and has a centerline on it. Just line it up on the centerline with the laser line overlapping exactly and mark the two sides of the keel land. I did this every three or four feet and joined those marks with a long straightedge. Keel land is laid out! |
|
|
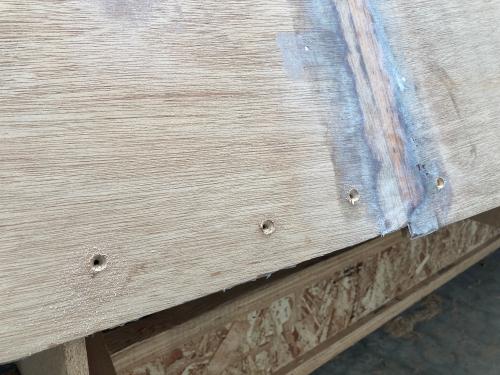
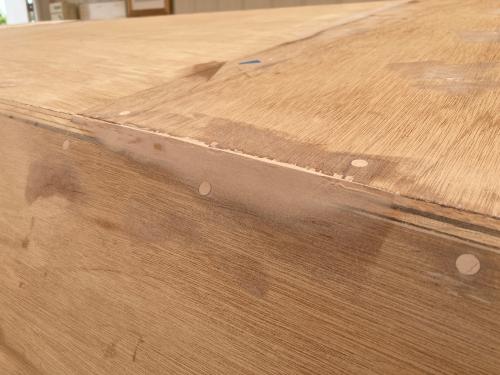
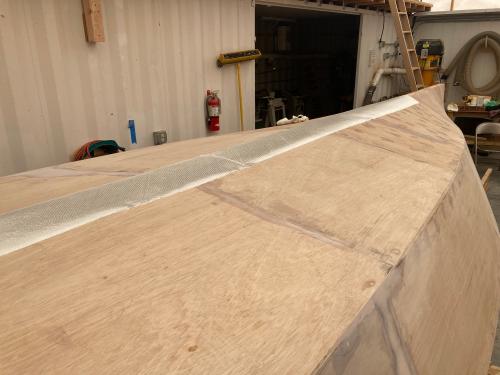
Next, I did the surface hollow for the modified Payton "scarf". Not a scarf but a way to keep things together when you butt join them. First, an angle grinder was used to make a slight hollow for a taped fiberglass and epoxy structural joint.
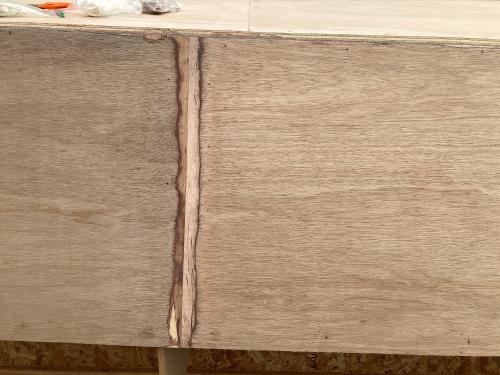 Then a taped epoxy and fiberglass joint is made in the hollow to join the two panels. In the photo below, a peel-ply layer has been applied to the generously epoxied joint. The peel ply will be removed a day later leaving a surface that will need little sanding. 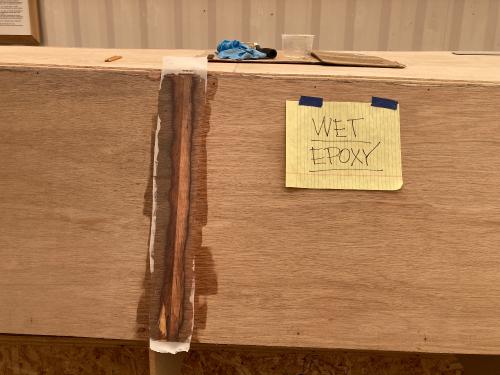 This joint can now be faired into the surface of the boat. It will hold up better than a straight butt joint and should be slightly stronger as well. |
|
|
This post was updated on .
In this chapter, we will fasten the boat with hundreds of bronze screws. The bank account is a little bit lighter after this operation! But the boat is all bronze, and she should last, so that's the important thing.
 The drills & countersinks were quite convenient. A combination from Whiteside did the job! The screws were #8 forward, #10 midship, keelson and stem, and #12 at the transom. Spacing was varied to accommodate the screw size, of course. 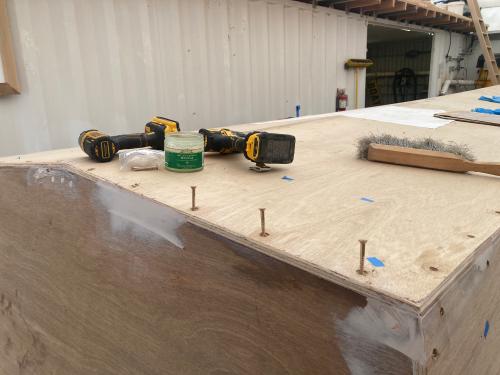 That's it until next time. |
|
|
This post was updated on .
Fairing is a lot of work, but it's what's needed to produce a fair hull. Inevitably some 'waggle' is built into every hull. It can be minor and usually is. The prescription for painted hulls is fairing.
 Basically, fairing compound is used in a similar fashion as bondo in body repair. It fills in the low spots. On this hull, there were some areas that were in need of fairing due to the design. The forefoot of this boat is made of multiple cross planked layers to form a very shapely boat. On a traditionally built, solid planked boat, this would mean planing and sanding to a fair shape. Unfortunately, plywood only twists so far, so some fairing and shaping is required. 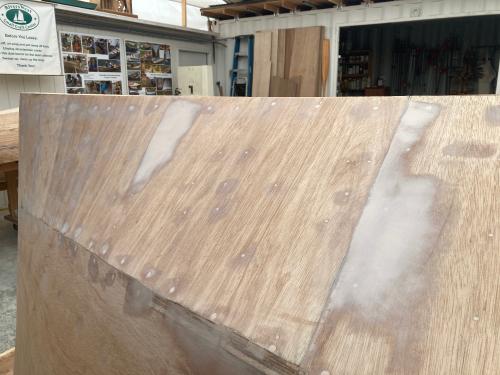 Then there was one instance where the scarf wasn't quite 'perfect'. All of you who haven't made a perfect scarf, please raise your hand. If you haven't tried a scarf, then your time is coming. Scarfs are one of the parts of boat building that preserve your humble nature. The imperfect scarf is getting fixed now. 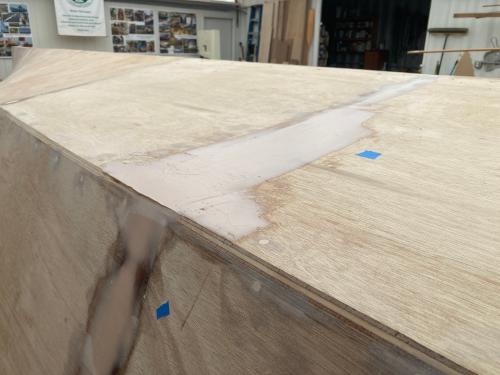 Next, on the forward topsides, I managed to get a misalignment in the butt joints between panels. Probably an overplaning of the butt block. 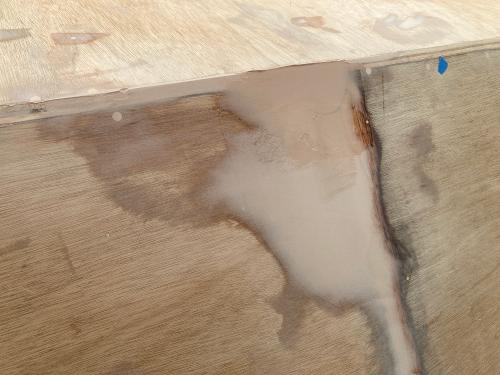 Again, a bit of fairing compound, a lot of sweat on the longboards and some ROS work for the big lumps take care of it. A note on longboarding: First, this is not a skateboard. It's a long sanding board that is used to identify and remove high spots in the hull. Once the high spots are identified, the fairing compound can be applied. In our case, the fairing compound we are working with is System 3's QuickFair. It's easily mixed, applies and adheres well and cures quickly. When you start to sand, make sure you wear your dust mask to protect from uncured epoxy dust. Fairing is a process. Go slowly and 'sneak up' on the final result. Heavy applications of fairing compounds in warm temperatures lead to bubbles that then need to be filled. So take your time, be patient and get the result that you really want. This is where you begin to establish your quality of finish. I'll write more about priorities of finished product later. All for now, see you later...We're going to do the final prep for fiberglass and epoxy! |
|
|
This post was updated on .
We've gotten to the point where we need to plane the keel land. This is the flat to which the keel will be fastened. First the keel land was laid out using the laser to keep it dead straight.
Most of the hull has been constructed to come to a peak at the keel centerline. That area will be planed off to form about a 2 1/2" flat which will allow the keel to be mounted to the keelson.  The forefoot near the stem is mostly flat with the keelson showing and planks overlapping. These overlapping planks are planed down to the keelson. First with the power plane, then finished off by hand. 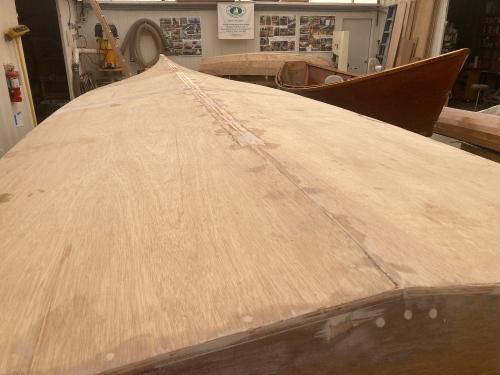 The aft section is planed to a flat. 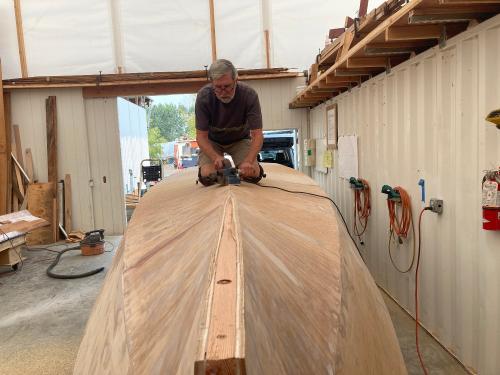 The flat is planed from aft to forward, completing the keel land. This process continues carefully to assure the land is dead flat. It is tweaked and flattened over its length. The progression is power plane to #4 to #5. The hand planes need frequent edge maintenance as planing the phenolic glue of the BS 1088 plywood is hard on them. 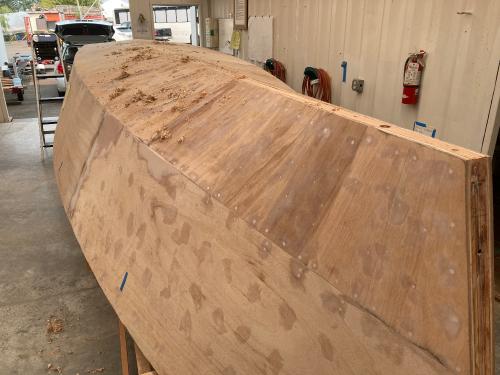 Once the flat is to our liking, the entire area is sanded to 120 with a slight radius on the edges of the land to allow the fiberglass reinforcement to smoothly be applied. |
|
|
Most of the keel land will have a 10" wide, 17 ounce fiberglass biaxial tape set in epoxy to reinforce the keelson and tie the port and starboard hull panels together. This is applied from the transom to about 5' aft of the stem. That forward area is severe enough that the heavy glass might not conform to the contours. So I will be using a double layer of lighter glass up there.
 The glass was laid out on the hull as shown above, ready to take epoxy. The Silvertip epoxy is used to saturate the cloth and the plywood under it. It takes a while for the epoxy to completely saturate the heavy cloth. I'm using slow hardener for this and after many years of using fast hardener on small boats, this process seems almost leisurely. 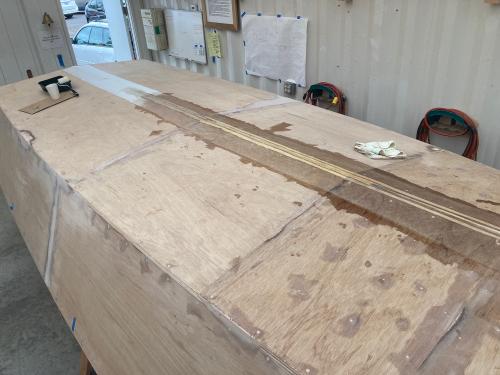 Multiple small batches were mixed and applied. It seemed that doing about three feet at a time was best. I'd wet out a section and by the time I got back with another batch, the area was ready for more epoxy and was saturated enough to lay down properly. Once the whole keel area was completely laid down, rolled out and bubble-free, I took a break. After an hour or so a fill coat with West System 410 filler mixed to about 50% by volume was applied. This didn't completely fill the weave, but got it much closer to flat. It will need another fill coat as the weave of the 17 ounce tape is pretty bulky.  This work is in preparation for final glassing. Once the rest of the keelson, stem, chines and transom joints are reinforced, the whole hull will be fiberglassed with 10 ounce cloth. |
|
|
This post was updated on .
I'll be catching up on recent progress. Haven't been writing much on this forum lately, but work on the boat progresses. This post will document the taping of the chines. Since the 17 ounce biax didn't like going around the chines very well, enough 12 ounce, 6" biax was purchased to do the chines and transom. It's a good compromise between strength and conformability. The tape was applied dry, secured with masking tape, then wetted out with Silvertip Epoxy.
 A good close-up is shown below after one application of epoxy. 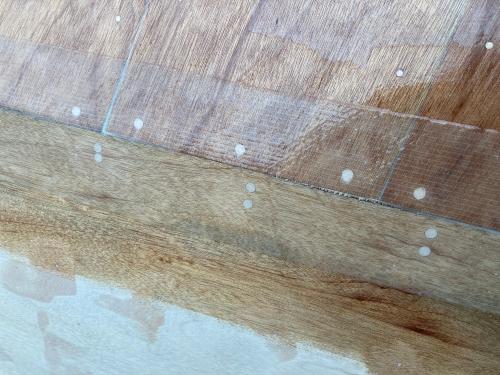 A second coat of epoxy was applied the next day. This photo shows fairing under the fiberglass. One of the nice things about Silvertip is that the re-coat time without sanding is 72 hours. I never take it to that point, but it's really nice to be able to come back the next day to complete the work rather than working through the night. 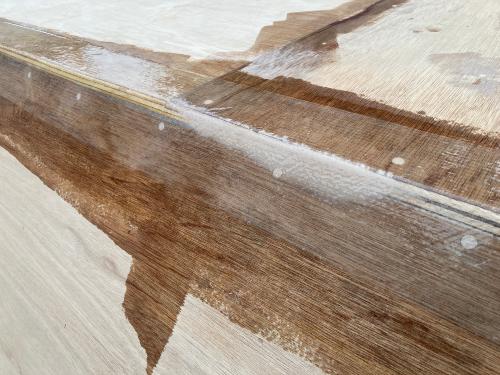 Finally a coat of epoxy with 407 was applied to fill all of the little divots caused by the texture of the fabric. Here it's been sanded smooth. 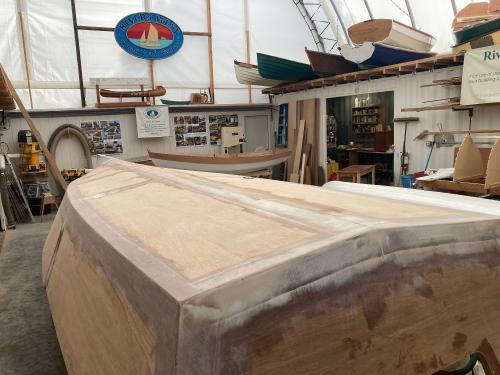 While this was being done, I also taped the forward section of the keelson with two layers of 12 oz biax. The first layer was 6" wide and the second layer was 8" wide. This gives both layers some 'tooth' on the plywood. Sorry, no photos of this but it did go down a lot easier than a single layer of 17 oz would have. |
|
|
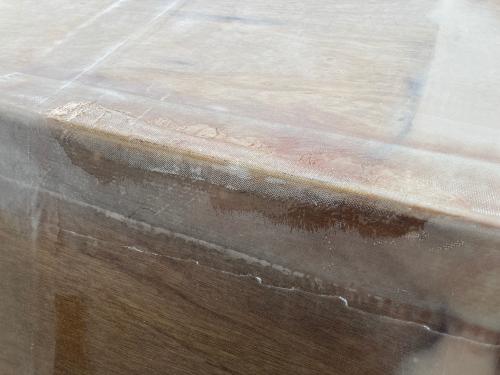
In this post, the outer stem is being laminated and shaped for the boat. As I re-read the Gougeon Brothers book, they were advocating for laminating stems & keels. I took the advice to heart and have laminated both for this boat. First a four ply lamination was formed.
 Then a three ply lamination was made, and later the two were combined into a seven ply lamination. I did this because I didn't want to have to rebuild my lamination jig...long story. Here's the seven ply in the clamps: 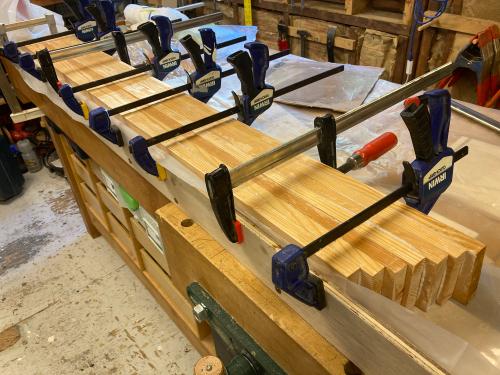 The laminated blank was surface planed to width and rough sawn to shape. Then it was fitted to the boat so it could be drilled for the carriage bolts that hold it in place. 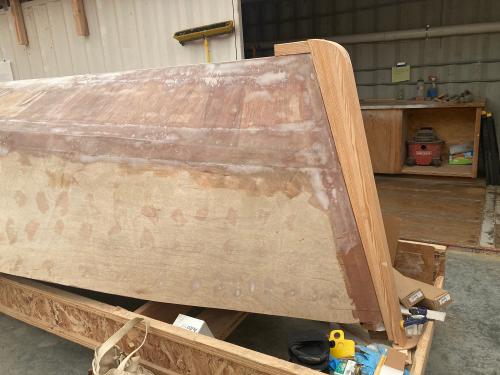 The blank was finished off in profile, then marked for shaping. 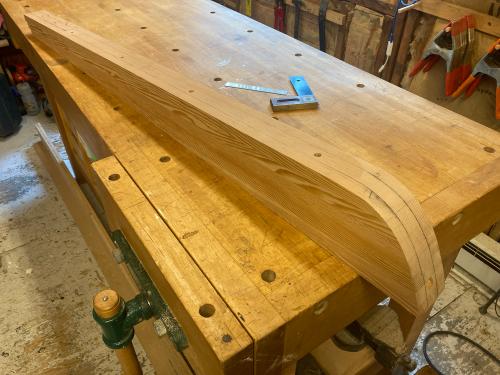 Then the shaping of the part ensued. Drawknife, planes and a spokeshave were used. It was all finished off with a longboard and sander. Here are some progress photos: 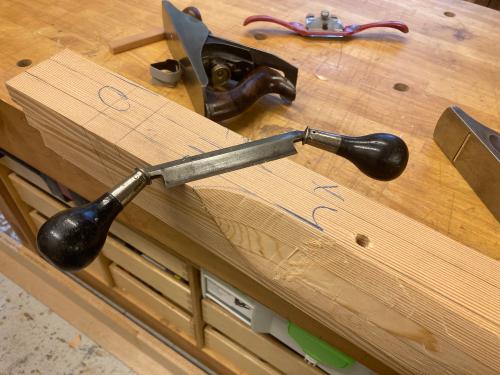 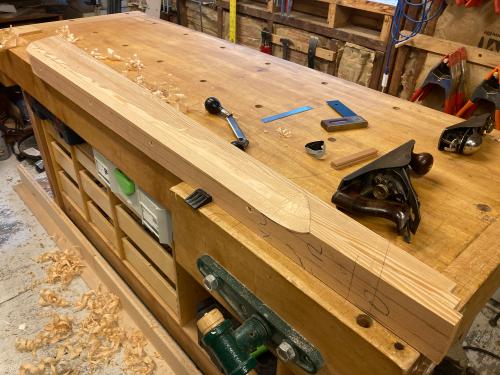 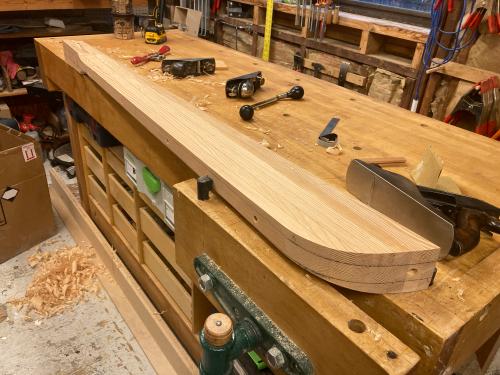 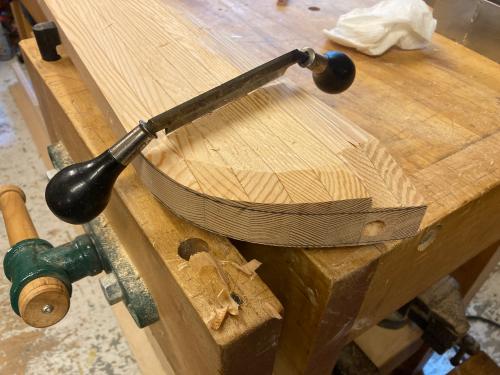 Here the part is almost ready to go. Because this is CVG Fir, and cutting tools were used, we had a few small imperfections due to tear out. These are marked with blue tape for fairing.  Here, one of the imperfections has fairing compound applied. This is important as this will eventually be fiberglassed to the hull. If a hollow was left here, it would become an air bubble under the glass, weakening the structure and creating a void where water could collect. 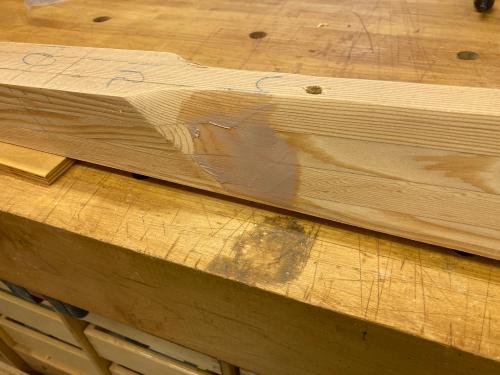 The blue tape indicates the 3/8" bore that doesn't get a countersink. This one will have the bow eye attached with threaded rod. 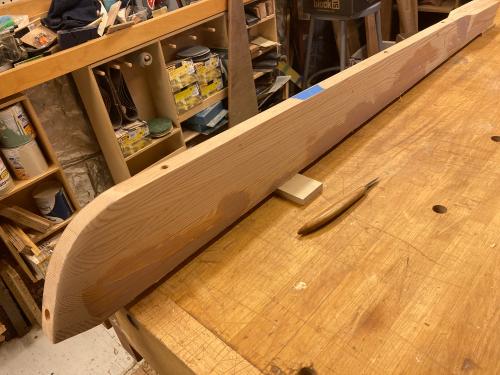 The last photo will show the faired and sanded part with a countersink for the 3/8" X 12" bronze carriage bolt that connects the lower part of the stem to the hull. The smaller bore is for a 3-1/2" X 14 Bronze screw that connects the stem, keel & keelson. 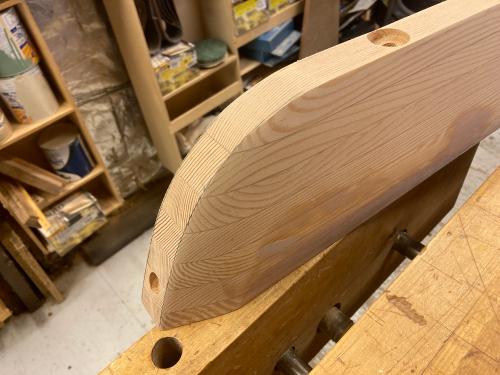 All of the bores are treated with epoxy for water & rot resistance. All for now! |
|
|
This post was updated on .
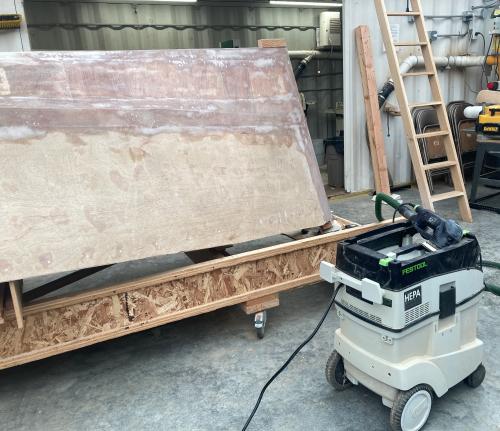
It was time to glass the hull. Luckily I was able to recruit Randy T. and Charlie E. to assist and we got a stretch of four or five days of projected 50 degree plus weather in the same time window. Prior to applying the glass, the whole boat was sanded to 80 grit. The Rotex and I became really good friends!
 We decided on Saturday that we would do half of the boat on Monday, then the other half on Wednesday. That gave us time to prime on Sunday and Tuesday. We were concerned that trying to do it all in one shot was going to exhaust us. That would lead to mistakes. Better to be safe. On Sunday, I went to the shop, wiped the hull down dry, then wiped the aft 11' or so down with towels and denatured alcohol until the towels came up clean. Once the hull was as clean as I could make it, straight epoxy was applied. We are using Silvertip epoxy from System Three. It doesn't blush, wets out well with our 10 oz. cloth and can be re-coated the next day for a chemical bond. All good attributes. The transom had been glassed prior to this work. 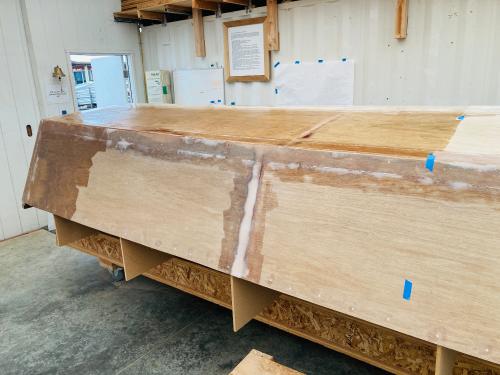 Monday morning I was able to sand the primed epoxy, using the Festool HEPA dust extractor and a mask for protection from the green epoxy dust. Then the sanded hull was washed down with towels and denatured alcohol. It's amazing how much dust is removed with the combination of the Festool sander and extractor. When Randy came in, we draped and cut the cloth to get ready for Charlie who had volunteered to be our mixer. Then we precut and numbered the peel-ply. At that point, the cloth was thoroughly saturated with epoxy. 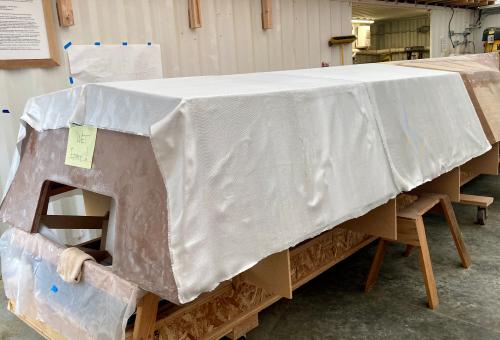 The glass was recoated with epoxy and then we applied the peel-ply, squeegeed it as flat as we could get it, hitting it with the roller when needed. This method makes a thin, strong and smooth lamination. It is a process that Randy has used successfully on several boats and so his help was critical to success. On Tuesday, the peel ply was pulled and the edges of the glass cloth were trimmed with a box knife. 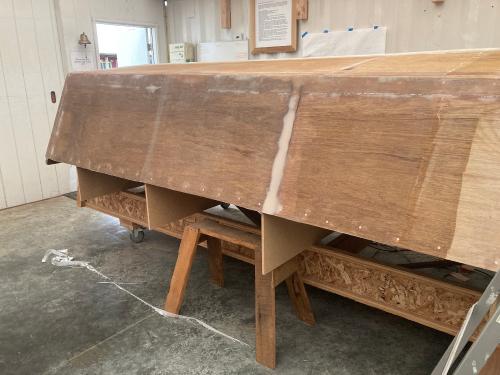 Then, it was on to wiping down the forward end of the hull, sanding and priming with straight epoxy.  Wednesday the process was repeated on the forward section of the hull. Charlie, our mixmaster was constantly busy both days. I owe him big! 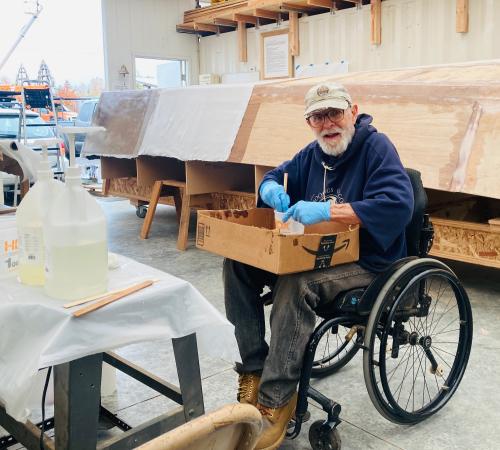 The wetting out process is interesting on this heavier glass. With lightweight glass, the cloth turns transparent very quickly. On the heavier glass it takes much longer. Slow hardener was a must even at the 55 degrees or so in the shop. 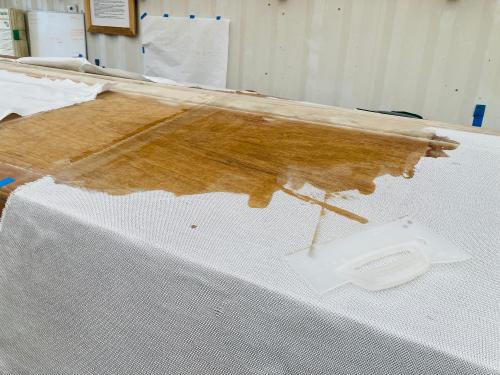 All of the peel-ply is precut to fit, so numbering the panels is important so you know that they are in the right place. Here the peel-ply is in place on the forward end of the boat. 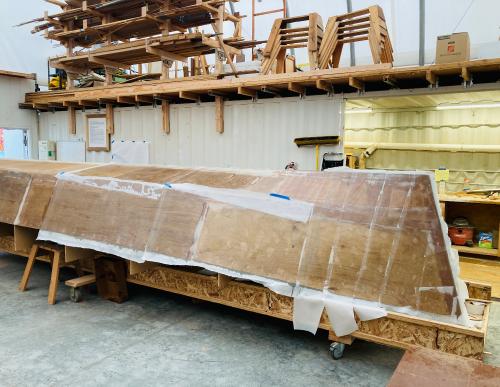 The next day, I returned to the shop to rip the peel-ply and trim the edges. A tribute as to how well this peel-ply lamination technique works is that on this boat we used about 3 gallons of epoxy to apply almost 20 yards of 60", 10 oz cloth. The job looks great! Many thanks to Randy & Charlie! It couldn't have happened without you two! |
|
|
Once the peel ply was stripped and the epoxy was partially cured, it was time to fair some more. The use of peel ply made a generally smooth surface. A longboard was used to identify the high spots, then the random orbit with 60-80 grit finished the rough sanding job.
 The area near the longboard shows how the longboard reveals the high spots. The white areas are high. A note on safety: Because the epoxy is still green at this point - not fully cured - a good dust mask is needed when long boarding. The ROS is connected to a dust extractor equipped with a HEPA filter. Epoxy dust is a dangerous material that you don't want in your lungs. Protect yourself. 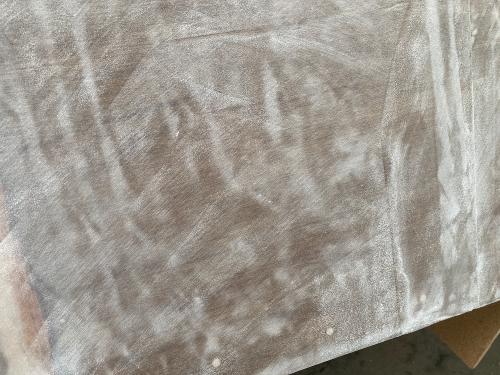 Another look at long boarding to reveal high areas. Note that the longboard was used at opposing angles in order to get the best result. If you haven't done this, check out videos on long boarding for proper technique. The more material that is removed this way, the flatter the finished product. 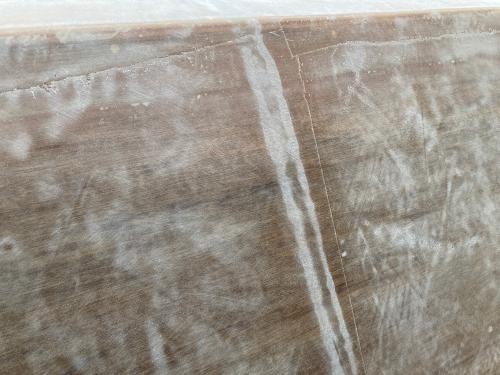 The double vertical line shows the overlap of fiberglass on the hull. If I had it to do over, I'd buy more glass and apply it along the hull with the overlap at the chine. It means buying more glass, and wasting some, but it would been a lot easier fairing in the long run. Lesson learned. 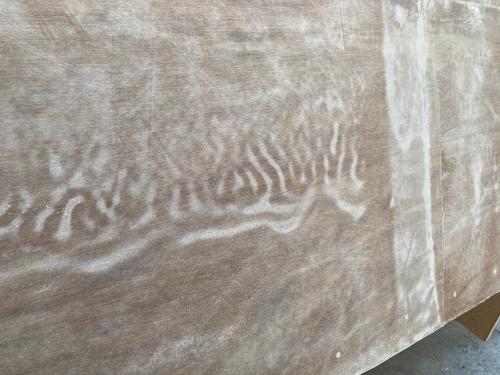 This is an example of where we didn't get the peel ply fully pressed into the epoxy. A little more fairing is required. Next time we will repair a bubble in the fiberglass on one chine. |
|
|
The hardest part of using peel ply is that you can't see through it to see that you have a good, flat application. On this boat we had one area on one chine with a bubble in it. Nothing too bad, as the bubble was only about ten inches long. The bubble had to be sanded out, then a tapered landing for reinforcing glass must be provided. The first layer of 10 ounce glass was cut on the bias and applied to the chine.
 The bias layer is fully wetted out then another layer of 10 ounce glass is applied. Each layer overlaps the layer under it. 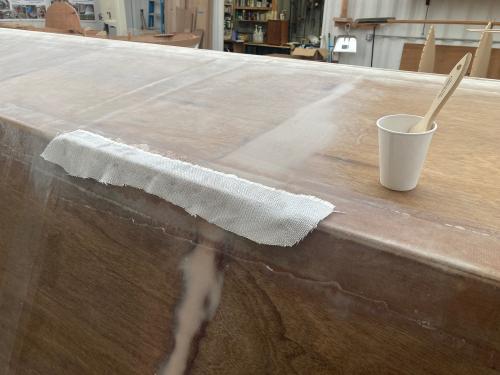 The second layer is fully wetted out and peel ply is applied. 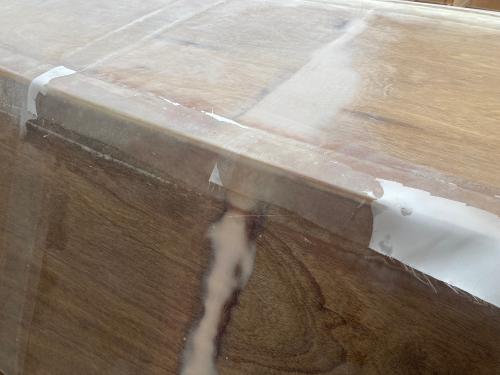 The finished repair blends perfectly into the rest of the chine. One of the great things about epoxy/fiberglass/plywood construction is that it is repairable. |
|
|
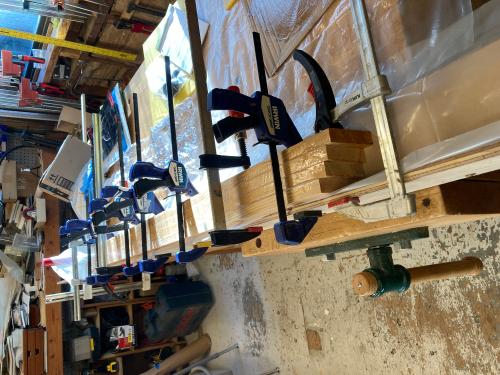
While all of this was going on, the keel was being prepared. I decided on a laminated keel 2 1/4" deep of three 3/4" laminations. First, we had to scarf the 3/4" CVG Firto 20 - 22' lengths. The planks were scarfed using the 12" chop saw and jig. This produces a beautiful, accurate scarf joint.
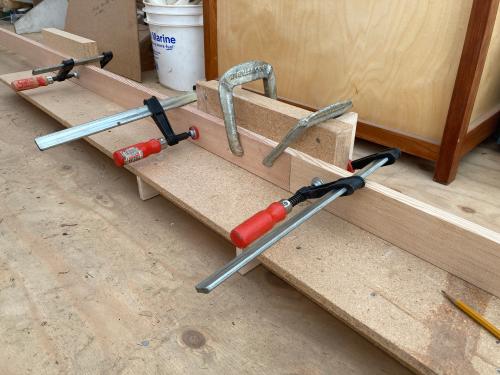 Once the three laminations were prepared, they were flattened with the #5 and laminated together. A couple of passes across the tablesaw and the keel blank was ready to fit to the boat. 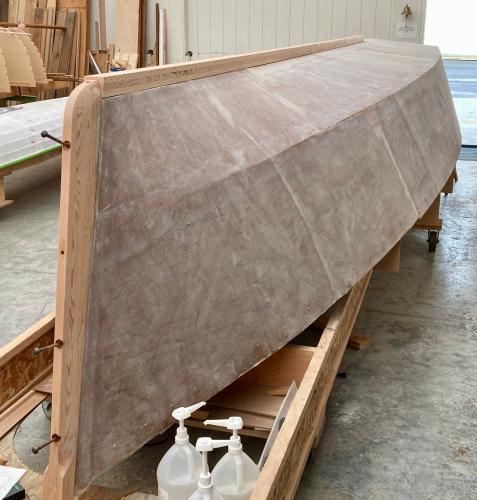 Once the keel is screwed, bolted and glued to the boat, it will get its final fairing on the boat. Stay tuned. |
«
Return to General discussion
|
1 view|%1 views
| Free forum by Nabble | Edit this page |