Finishing the Shellback Dinghy
12

12
|
It's time to paint the boat. I decided that I wanted to use System Three's WR-LPU cross-linked, water based polyurethane. By the way, I don't advocate using cast iron tables to put paint cans on. At this point in the project, the bandsaw was one place that didn't have parts stacked on it!
 "San Juan Tan was chosen as the interior color. But first, there was a lot of masking to protect everything that wasn't supposed to be this color and the interior had to be primed. System Three recommends their "Yacht Primer" for this paint. Yacht Primer is a two part, water based epoxy primer. Three coats were rolled and tipped into the interior of the boat. 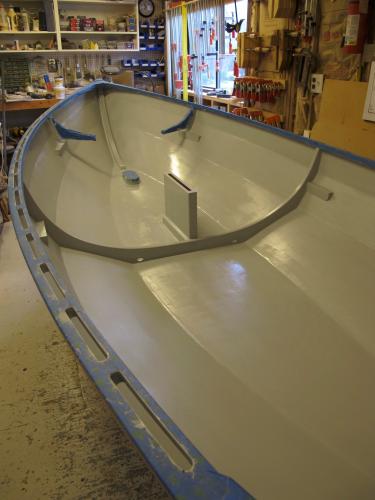 This went pretty well, it dried fast in the 63-64 degree shop. I am glad that it wasn't any warmer as the primer set up pretty fast, so I had to roll smaller areas than I would have liked prior to tipping off. After the primer was allowed to cure, it was sanded and the paint started going on. To mix the WR-LPU, a cross linker is added in very small quantities. The cross linker improves toughness of the finish. First coat didn't cover well at all, but as successive coats were added, the color intensified. It looks more yellow than tan to me, but it is a nice color. The paint is supposed to cure to full hardness in about two weeks. 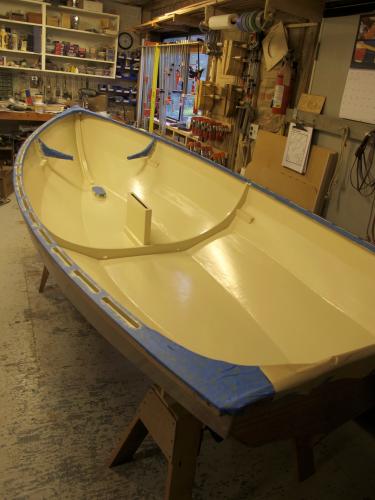 One challenging thing was the amount of detail work it took to mask off the scuppers. The scuppers are interior color but the gunnels will be bright. The area was masked, then the scuppers were cut out with a sharp knife.  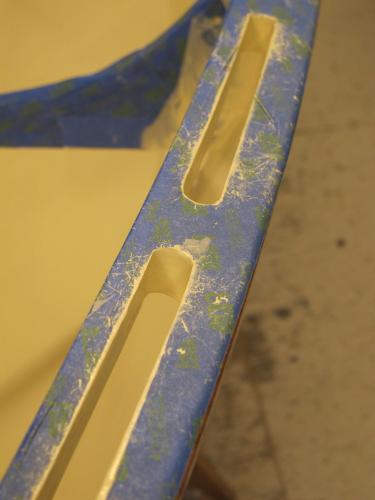 The result is just what I was after. 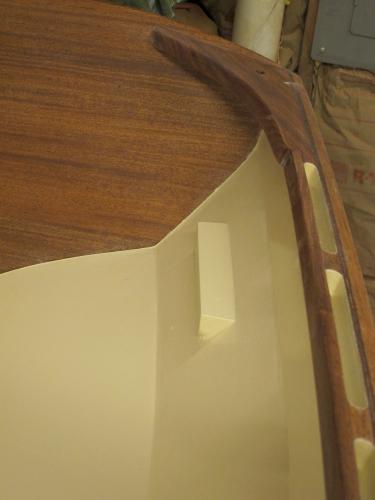 Varnishing will be another story, but I'll solve that when I get there! In the next post, I'll flip the boat over to prime the exterior of the hull. |
|
This post was updated on .
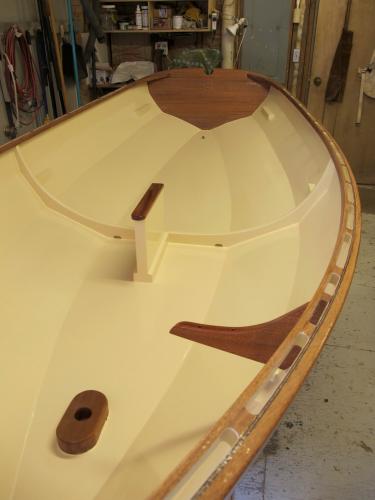
Here's what the interior of the boat looked like before I flipped it over to finish the exterior.
 Then it was time to rotate the boat again and start sanding again. One of the nice things about this boat is that the strakes can be machine sanded throughout most of their length. Real labor saver. Once the boat was sanded, I was ready to wipe it down and start masking off all of the brightwork. 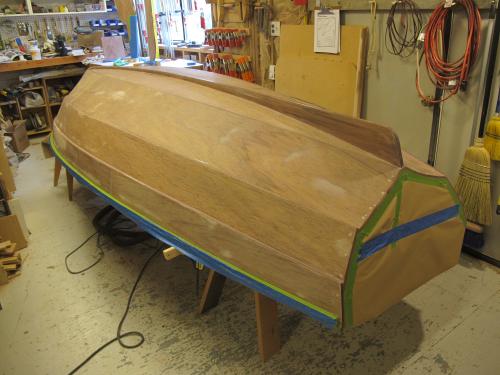 Three coats of Yacht Primer and it was pretty much ready to go. There were a couple of small defects that I will have to clean up before painting, so those will be faired, epoxy coated and primed before painting. 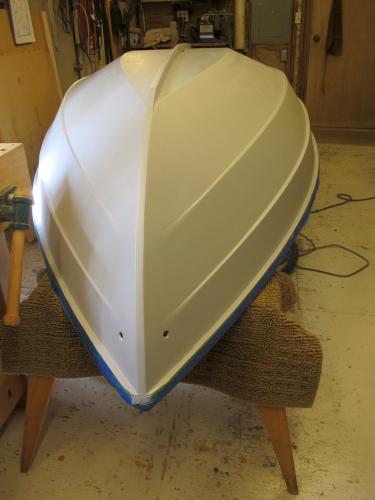 While I was priming, the painted parts of the rudder, plug & daggerboard were primed as well.  Then, while nothing else was happening, I sealed the thwarts with varnish in preparation for finishing with more varnish.  |
|
This post was updated on .
Exterior finishing was less satisfying than the interior. The interior isn't perfect, but it is much better than the exterior turned out.
Somehow the white color for the exterior didn't behave like the San Juan Tan. I tried sanding between coats, ScotchBrite, thinning to various stages. I had very good conditions with the shop temperature at about 63F and 50-60% RH. The finish would not flatten out and did not flow. It was nearly impossible to maintain a wet edge using a roll and tip application. The problems occurred in the tipping stage. I was never able to make the area covered small enough to maintain a wet edge. At five coats I ran out of material. And patience. Now my plan is to wait for two or three weeks to let the WR-LPU cure, then sand and re-coat with Brightside, EZ-Poxy or maybe Kirby enamel. Still don't know. In the meantime, I stripped off all of the masking so the residue didn't contaminate the surfaces intended for varnish. I would use System 3's water based Yacht Primer again in a heartbeat. The WR-LPU, only if I didn't intend to tip off for a smooth finish. |
|
Here's an update on the exterior finishing of the Shellback. I ordered a quart of "Maynard Bray Off White" from the George Kirby Jr. Paint Company. Kirby has been making paints for boats for over 170 years. Working with this oil-based finish is really quite nice. It flows well and maintains a wet edge.
The color is really nice - just "off white" enough to be interesting and soft. It is a good color with the San Juan Tan interior and the Khaya compliments it beautifully. 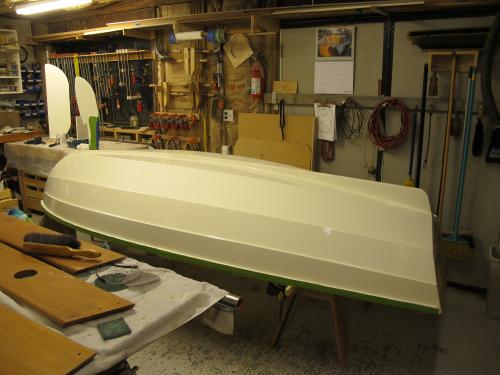 The hull was completely sanded to 240 prior to the first coat. Rolling and tipping went extremely well. I didn't sand prior to the second coat, but feel that it would have been better to at least scuff it with a ScotchBrite pad. I ended up with some little holidays in the second coat and one tiny run. For the third coat I have sanded to 320 and will apply the finish in the morning as the weather is warming up. |
|
The final coat of finish went on beautifully. Just a couple of spots needed some more finish which I was able to apply the next day.
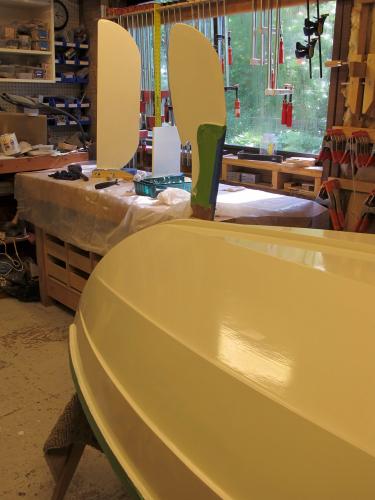 Then I went off to DC for a couple of weeks. Varnish is next. |
|
After returning to the rain, I started prepping the hull for varnish. Most of the separate parts: Daggerboard, rudder, daggerboard trunk filler, tiller, thwarts have been coated with seven to eight coats of my preferred Le Tonkinois varnish and sanded to 320 for a final coat.
The varnished parts for the hull have been epoxy coated and sanded to 320. When I got home, I turned the hull to an upright position and readied the bright parts for finish. The first coat went on beautifully. 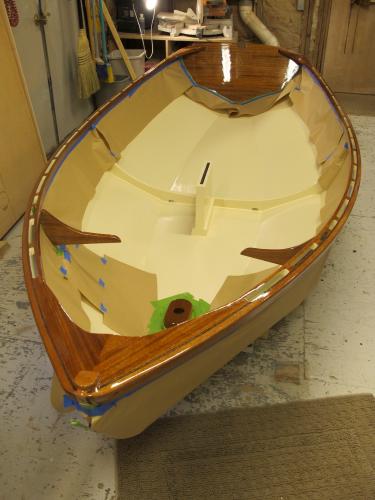 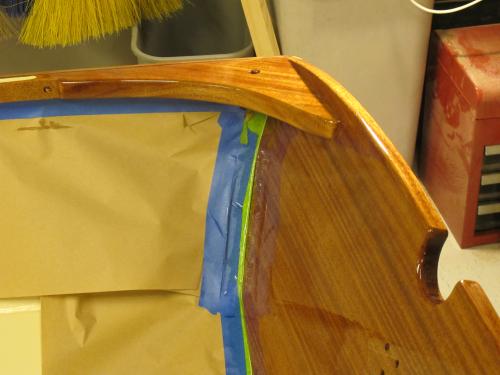 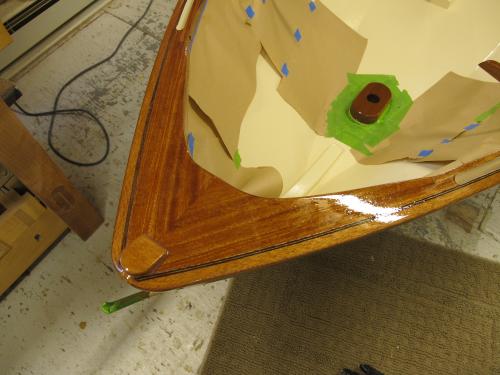 At the same time, the separate parts were given a final coat of varnish. Now, only seven more coats are needed to finish up the hull. I'll do five to seven build coats for protection, let them cure, then sand to 320 for the final coat(s). |
|
As I finished up the third coat of varnish, it was harder to cover. The holidays didn't cover and the material wasn't going on smoothly and laying down. Different conditions, different result. So I let the third coat cure for 36 hours or so, sanded/scotchbrited the result and laid down a fourth coat of varnish. It laid down beautifully. I'll do another coat tomorrow and see how that lays down.
Varnishing doesn't seem to respond to a formulaic approach, but needs an experienced hand and eye to really work. Sometimes I can lay down five or six coats without interruption by hot-coating. Sometimes only two. Temperature, humidity, material, surface. It all comes into play. But really, it might be the varnish Gods/Demons that make all of the difference! Who knows? |
|
Mark,
In human affairs --including applying varnish-- there is a lot more randomness than humans want to acknowledge, except --of course-- when things go their way. Then they are quick to take credit for things that happened by chance. When you're laying down a coat, are you making a deliberate effort to work dry to wet? Amateurs tend to paint in the opposite direction, beginning each new brush stroke where they left off and end up applying the coating --be it paint or varnish-- too thickly, which makes tipping hard. As for "holidays", that's a matter of understanding that eyes fatigue quickly, and the brain makes us see things that aren't really there. Hence, looking away is necessary. That, and good light, so that bare spots show up. Will you be bringing then boat to the FBB? Charlie |
|
Charlie,
I roll and tip varnish. The varnish is rolled out uniformly on the surface prior to tipping off. On larger areas like the transom, rolling out is done at multiple angles across the grain, then it is tipped with the grain. This approach gives a very uniform film thickness and avoids most holidays. The snags come with multiple hot-coats. First, you are coating gloss on gloss - extremely hard to see what you are doing. Then, as humidity and temperatures change, the varnish starts handling differently. At some combination of warmer temps and higher humidity, you can't hot-coat and must sand between coats. The weather today discouraged me from another hot coat this afternoon. I hope to have it at the Messabout. Won't have the rig finished up, but may be able to row it. Mark |
|
Varnish coats #5 & #6 went on today. 320 and scotchbrite were used to flatten it out, then a coat was applied about 3 PM. The weather was warmish today, so by 9:30 it was ready to hot re-coat. Both coats went on well due to the temp and RH in the low sixties.
|
Re: Finishing the Shellback Dinghy
|
nice shop
|
|
It's been a while since I last posted on this thread. I had projects to complete at home prior to the rains, which I have finally completed. Thanks to Charlie Gripp for lending a hand on my "Behemoth Door Project." The doors to my shop had to be replaced and he was able to help out, and I appreciate it very much.
In the interim, I completed the varnishing to eight coats, installed the thwarts and oarlock blocks but didn't fasten the forward thwart as it is also the mast partner. I've already located the mast step, so the partner will need to be shifted to make fine adjustments in the trim of the mast. In the last couple of weeks I was able to purchase the material for the spars, rough cut it to width and earlier this week, Charlie Ehm was able to help me out with thickness planing at the RW shop. Today I glued up the first spar blanks for the boom and yard. 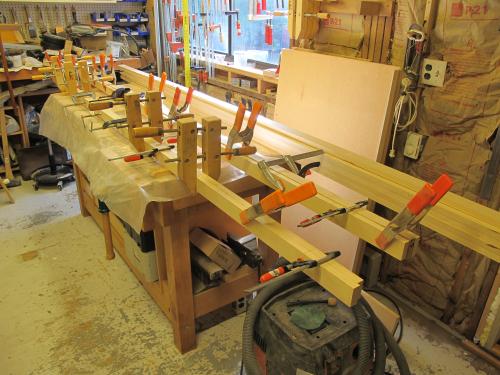 Gluing up the mast will be done this weekend once these spars have cured. While this is obviously second growth Spruce, it is clear and straight so everything went well. With our RiversWest discount at Crosscuts, it was even fairly priced! |
|
More spars. The mast was glued up with thickened epoxy and cut to rough shape on the bandsaw. The new shop doors (home project #2 of #4 keeping me away from boat building) made the bandsaw work so much easier! I was able to move the bandsaw to the front of the tablesaw, open the doors and easily handle the 10'+ long stock.
  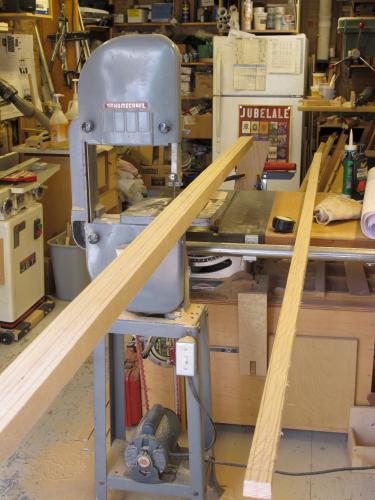 The yard was finished to rectangular shape as shown in the drawings. Then the boom was planed to final profile with four sides. I made a spar gauge and made the planing marks to take it to eight sides. 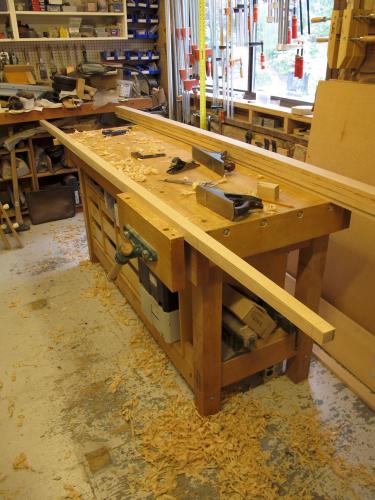 The boom was planed to eight sides. Then spiral markings were made at several points along its length to be able to keep track of the segments as you make the spar sixteen sided. 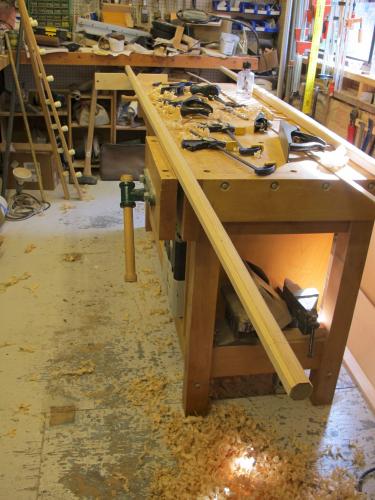  It was planed to sixteen sides. At this point it was round enough to 'eyeball' 32 sides, then sand to final shape. At this point the boom looked so good that it made the yard look clunky in its rectangular form. I decided to make the yard oval in cross section. It shouldn't reduce the strength much, if any, and made it lighter in weight and in visual weight. I'm pleased with it. 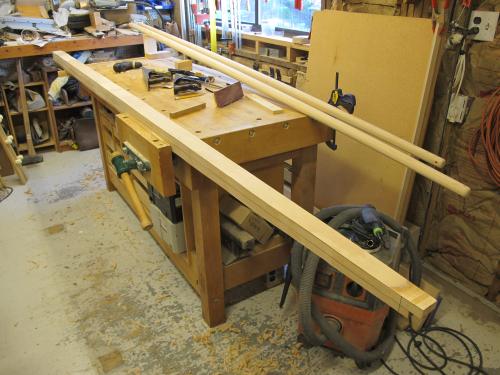 The band sawn mast blank is in the foreground with the boom and yard ready for varnish behind. |
|
This post was updated on .
Today I had one day to fit the mast before the rains came. Haste was made! Yesterday I figured out that planing by hand was going to be a tedious, thankless task! So, I borrowed the RiversWest 4" portable planer and the days worth of hand planing and sharpening turned into a couple of hours of careful work. Careful, because I was learning to use the tool, which was terrific. I wasn't even sore the next day!
The lower mast area was planed to shape and the reduction for the mast step was formed.   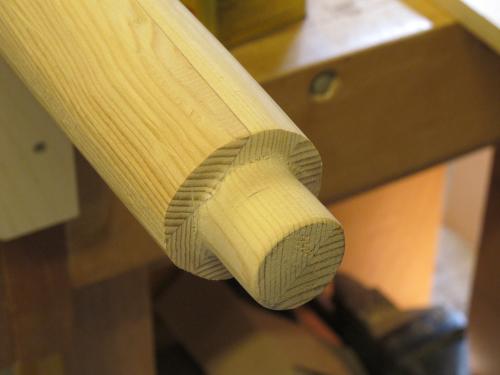 The mast was fitted to the hull and leveled to fair.  As before, the mast was marked for hand planing to finish the mast to a round and fair assembly.  Then a little hand planing to sixteen sides, then thirty-two then I lost track! I placed a small contrasting plug of Spanish cedar in the mast to designate 'forward'. 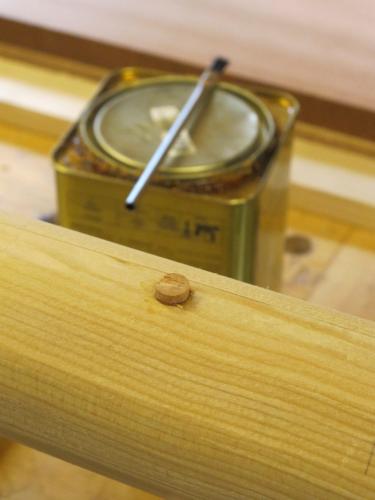 After planing the mast to the fairest that I could make it, I used my ROS to finish the mast to as round as it can be made by hand. The ROS was used like a plane, scrubbing off the corners. 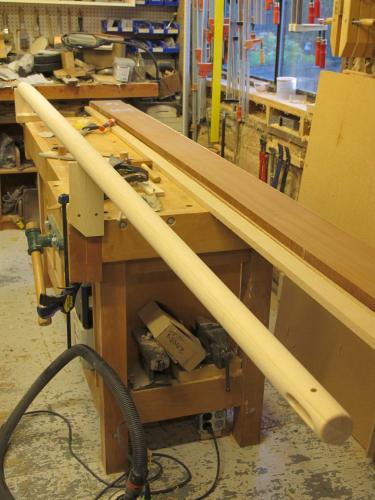 The mast and spars were given a prime coat of varnish. 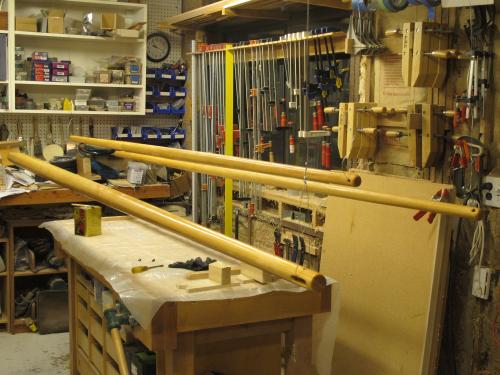 That's all for tonight. Plenty to do tomorrow! |
|
This morning I gave the eighth coat of varnish to the spars. Thank goodness.
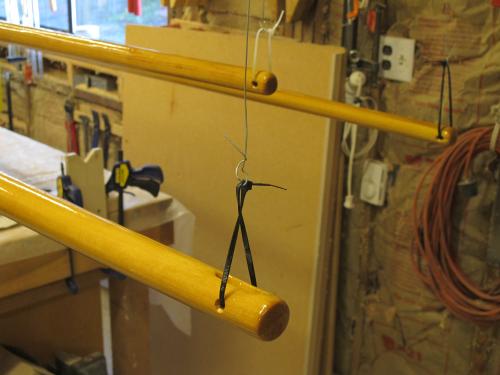 Seems to me that by the eight coat, it's time for varnishing to be over!  While I consider myself a fairly accomplished varnisher, I learned a lot in this process. First, a spar is a tough thing to varnish, especially when it's held horizontally as I had to do. The round shape makes any excess varnish pool at the bottom, creating droplets of varnish on the bottom, ruining the finish. The key seems to be applying thin coats and rotating the spar for the first hour or two in the drying process. In order to be able to apply thin coats, I prepped the surface between coats with green Scotch-brite as recommended by Bruce. That little bit of tooth allows you to varnish in thinner coats. Then, I rotated the spars two or three times after finishing as recommended by Charlie. It truly does take a village to learn this stuff! BTW: I've been varnishing at 62-64F and 50-60% RH which seems to be about perfect. This should be the last coat of varnish and once it's cured I'll be able to rig the boat. Chuck has offered to help me with rigging. That should be good. I've done a lot of reading about lug rigs, but nothing beats experience! |
|
Mark,
According to the "pros", if you haven't lost count of the number of coats, you need more varnish. [ROTFL] But you "cheated" a bit, right? by applying two undercoats of epoxy. So, maybe, the pros would let you off with doing just eight. [More ROTFL] How long are you going to let the varnish cure? I'm not remember the rule-of-thumb recommendation before putting bright work into service. But I'd guess a week, and 30 days before the stuff is truly "cured". Looks great. Congrats on getting another big chunk of work done. I'd love to be there for the initial launch. Charlie |
|
No epoxy on these parts. The spars along with the thwarts are pure varnish. I want to see how it wears compared to epoxy + varnish on the hull.
|
|
Mark,
Now that I think about the chafing the spars will likely get from canvas and lashings, an epoxy undercoat might have been a prudent choice. But as you say, actual usage will determine the wisdom of choices. Charlie |
|
Charlie,
My thinking was that because the spars are subject to damage, the varnish would be easier to repair than an epoxied part. As it turned out, once the leather was fitted to the mast partner, the lower mast section was slightly too large. I gave it clearance, but not enough. It took less than a 1/16" to hold the mast 3" above the mast step! I had to spokeshave and sand the lower mast to fit then blend in the varnish. A leathering post will follow. Mark |
|
OK - So this is the leathering post. At this point I needed to leather the mast partner and the sculling notch. This will cushion the mast and sculling oar as well as the hull parts. So here goes: I decided to do the sculling notch first. It's a smaller part but two sided, so more difficult in that way.
First I cut a leather blank that had two half inch sides + a 7/8" middle for the transom thickness then a little bit extra for the radius on each side. 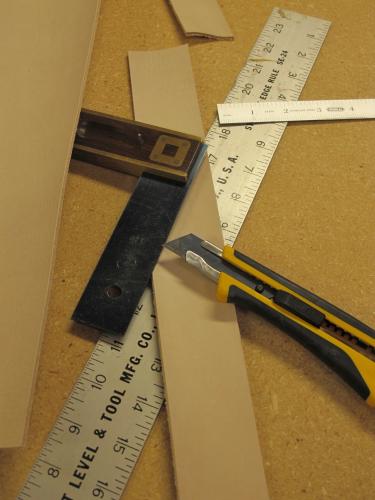 The photo shows the tools and the cut blank for the sculling notch. The segments were laid out to allow the leather to go around the sculling notch. This laid out to about 3/4", which is about right. The notches were first laid out for spacing, then cut in the leather by eye. A perfectionist will lay these out more accurately. Two applications of contact cement were applied to the rough side of the leather and one to the notch itself. Then the leather was applied to the notch, with the leather held off the transom by dowels to allow time to get everything aligned. The finished result was like this: 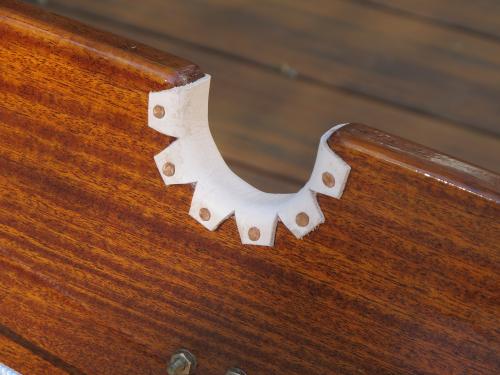 Then on to the mast partner. It was more difficult because it is a 360 degree assembly. Everything had to be just perfect. The process was the same. But more difficult. The key to this is careful moves that follow a process. The contact cement is unforgiving, but the leather is. So the key is to make your process allow for small contact points on the contact cement, so you can make corrections as you go along. Once the leather is in place, the tabs are turned to the mast partner and clamped into place. This clamping can be brief - 20 minutes to allow the glue to bond. Then proceed with tacking the tabs into place. 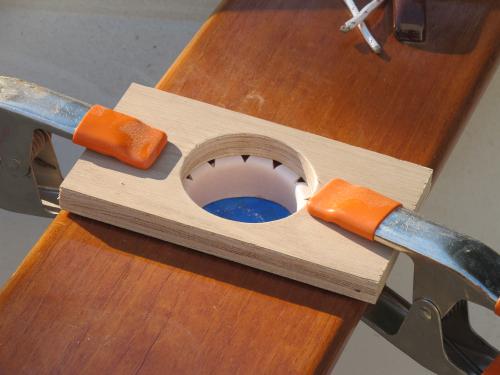 Tacking into place takes just a few common tools. 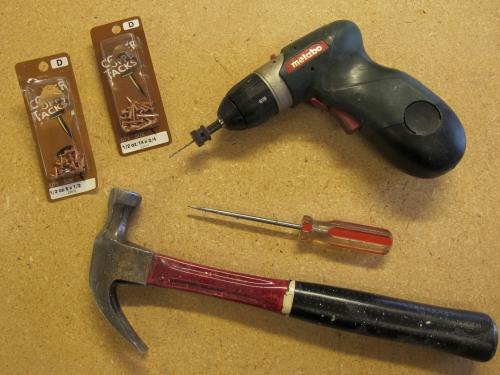 I didn't use the drill, favoring the awl to prepare both the leather and the mahogany for copper tacks. BTW: the copper tacks were chosen because they are cheap, available and appropriate for the workboat style I wanted for this particular boat. It was a builder's choice. Your choice will be yours. |
«
Return to General discussion
|
1 view|%1 views
| Free forum by Nabble | Edit this page |

