Re: Point Comfort 23
Posted by MarkR on
URL: http://riverswest-forums.266.s1.nabble.com/Point-Comfort-23-tp527p535.html
Thank you, Craig. I will attempt to keep up. Sometimes it seems one has to make a choice between working on the boat or posting progress updates here.
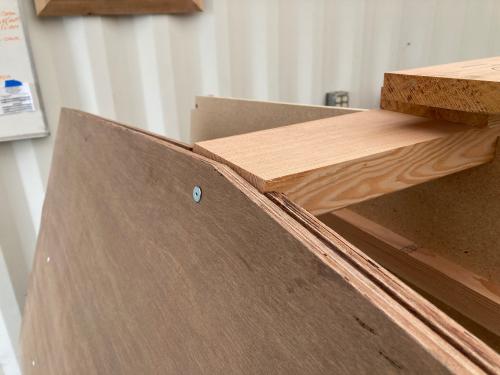
The next piece of work was fitting the keelson in place. First the keelson was cut to the proper angle for the transom, then fitted to the transom notch with a small notch to the upper (lower in the photo) side of the keelson blank. In the first photo it was dry fit with a temporary screw, then disassembled, glued and re-attached with the screw holding it in place. The temporary screw was soaked with WD-40 to assure that I could disassemble it.
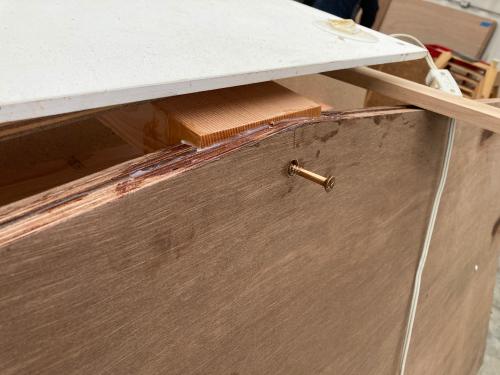
The next photo shows the glued part, with the radiant heater warming the joint, after drilling for the #14 X 3 1/2" bronze screw. This joint will get two more permanent screws once the keelson is beveled. The outer transom plywood piece isn't quite perfect, but it is larger than needed. It will be beveled to take the planking.
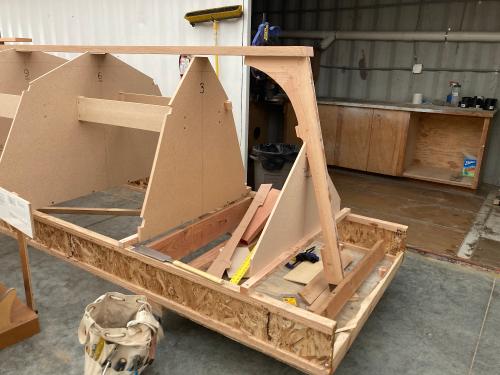
Then we moved forward to the stem. The stem was positioned for correct length from bulkhead 3 and alignment to the building frame. It was a 3 dimensional puzzle. With the help of the laser level to keep the stem vertical and the waterline horizontal, it was locked into its proper place. A temporary screw forward and a clamp held things in place. The hole for the carriage bolt at the aft end of the inner stem was drilled and a temporary carriage bolt had us ready to glue this joint.
The joint was taken apart, glued with thickened epoxy, temporary fasteners were soaked in WD-40 and it was cinched back into place. The radiant heater was positioned to keep the joint area warm enough for the epoxy to go off. As this was being done, the temp was dropping into the low 40's.
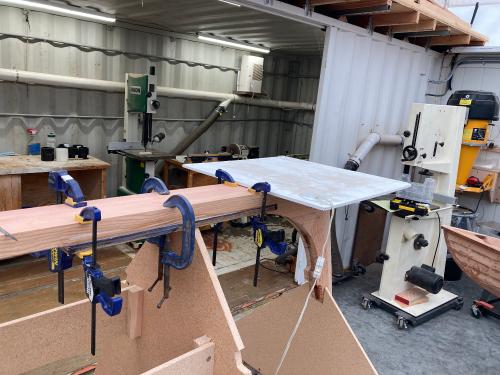
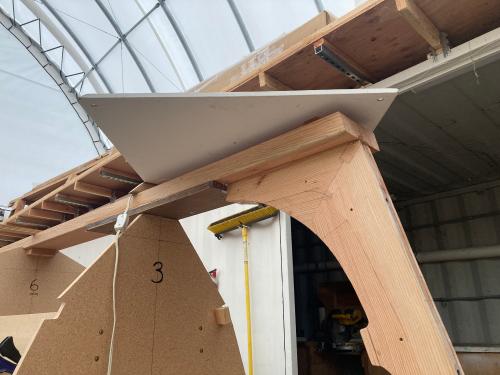
This photo shows the plywood stiffener being glued to the area between the end of the stem and station 4. The heater was placed right on top of the clamps to keep the joint warm.
The temporary screw was removed, the hole re-drilled and a permanent bronze screw was driven.
While the screw came out easily, the temporary carriage bolt wouldn't budge. For this project I'm using System 3 GelMagic to glue the wooden joints. It's very easy to use and there's no mixing involved - it all happens in the nozzle of the cartridge. What I'm finding is that it's more tenacious in its grip than thickened Silvertip. Sometimes the GelMagic is more powerful than the WD-40 magic! It appears that the undersized bolt (5/16 in a 3/8 bore) allowed a lot of epoxy into the bore. Eventually, to get the bolt out, the parts were heated and the bolt was threaded out with the use of a double nut on the bottom and vise grips on the head of the bolt once it cleared the counterbore. The WD-40 probably helped to lubricate the epoxy 'threads' that were cast into the bore.
Now the boat is tied together stem to stern & I'm feeling quite good about it. Next time we will move on to scarfing the sheer clamps and chines.
URL: http://riverswest-forums.266.s1.nabble.com/Point-Comfort-23-tp527p535.html
Thank you, Craig. I will attempt to keep up. Sometimes it seems one has to make a choice between working on the boat or posting progress updates here.
The next piece of work was fitting the keelson in place. First the keelson was cut to the proper angle for the transom, then fitted to the transom notch with a small notch to the upper (lower in the photo) side of the keelson blank. In the first photo it was dry fit with a temporary screw, then disassembled, glued and re-attached with the screw holding it in place. The temporary screw was soaked with WD-40 to assure that I could disassemble it.
The next photo shows the glued part, with the radiant heater warming the joint, after drilling for the #14 X 3 1/2" bronze screw. This joint will get two more permanent screws once the keelson is beveled. The outer transom plywood piece isn't quite perfect, but it is larger than needed. It will be beveled to take the planking.
Then we moved forward to the stem. The stem was positioned for correct length from bulkhead 3 and alignment to the building frame. It was a 3 dimensional puzzle. With the help of the laser level to keep the stem vertical and the waterline horizontal, it was locked into its proper place. A temporary screw forward and a clamp held things in place. The hole for the carriage bolt at the aft end of the inner stem was drilled and a temporary carriage bolt had us ready to glue this joint.
The joint was taken apart, glued with thickened epoxy, temporary fasteners were soaked in WD-40 and it was cinched back into place. The radiant heater was positioned to keep the joint area warm enough for the epoxy to go off. As this was being done, the temp was dropping into the low 40's.
This photo shows the plywood stiffener being glued to the area between the end of the stem and station 4. The heater was placed right on top of the clamps to keep the joint warm.
The temporary screw was removed, the hole re-drilled and a permanent bronze screw was driven.
While the screw came out easily, the temporary carriage bolt wouldn't budge. For this project I'm using System 3 GelMagic to glue the wooden joints. It's very easy to use and there's no mixing involved - it all happens in the nozzle of the cartridge. What I'm finding is that it's more tenacious in its grip than thickened Silvertip. Sometimes the GelMagic is more powerful than the WD-40 magic! It appears that the undersized bolt (5/16 in a 3/8 bore) allowed a lot of epoxy into the bore. Eventually, to get the bolt out, the parts were heated and the bolt was threaded out with the use of a double nut on the bottom and vise grips on the head of the bolt once it cleared the counterbore. The WD-40 probably helped to lubricate the epoxy 'threads' that were cast into the bore.
Now the boat is tied together stem to stern & I'm feeling quite good about it. Next time we will move on to scarfing the sheer clamps and chines.
| Free forum by Nabble | Edit this page |