Re: Point Comfort 23
Posted by MarkR on Jan 13, 2023; 9:26pm
URL: http://riverswest-forums.266.s1.nabble.com/Point-Comfort-23-tp527p530.html
I will call, Charlie. I really appreciate your help. Right now I'm out of town but will be returning next week, so more progress will be made. In the meantime, I'll bring this up to date.
The next thing to do was to construct the stem and transom. The stem came first. Doug called out four layers of 18 mm plywood for the inner stem. I thought about how many times I'd be sharpening plane irons for the shaping of the stem and thought there should be a better way. I decided on CVG Fir cheeks with a single 18 mm plywood core. All of the planing to shape for the stem will be in the CVG Fir.
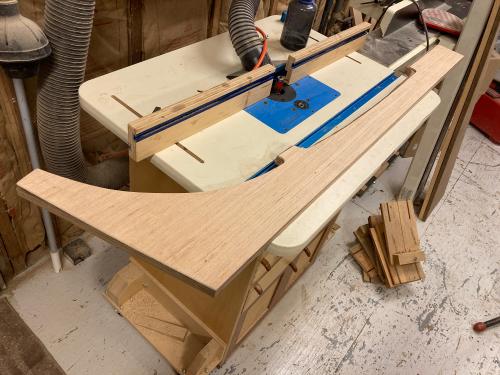
A template was made of door skin material, then transferred to the plywood core. The core was rough cut to shape then finished off on the router table with a pattern bit.
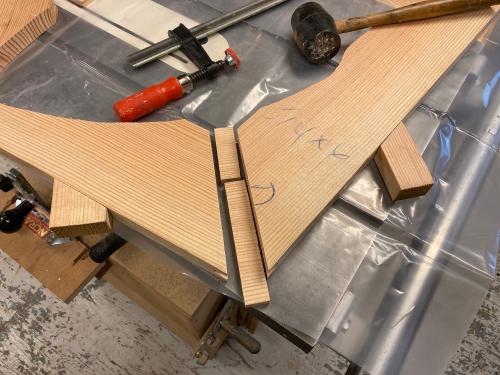
The two sections of the inner stem cheeks were splined to make a strong joint. These will be glued with thickened epoxy. One note: All mating surfaces were painted with epoxy - un-thickened - until they would no longer absorb epoxy. Then the thickened epoxy was painted onto the parts and the parts were clamped up. This avoids starving the joint of epoxy and makes the strongest possible joint.
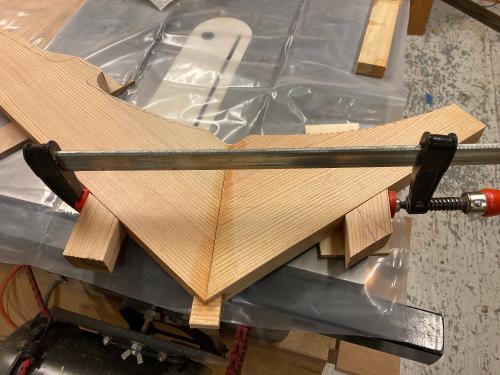
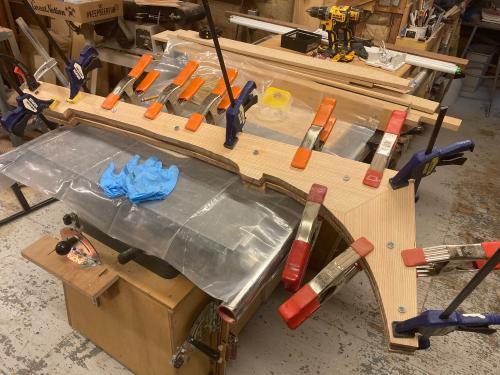
The parts are glued up and clamped. Note the clamping cauls: They were glued to the parts with hot glue. The hot glue holds well but can be removed once the epoxy is set.
Once the epoxy cured, it was time to glue the cheeks to the core. Same technique was used to glue the cheeks to the core. A combination of screws and clamps hold it in place for the epoxy to cure.

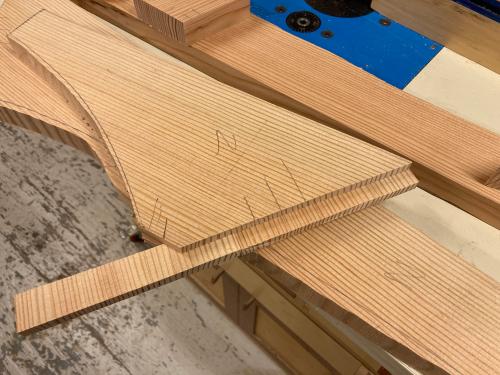
After curing, the part went back to the router table. The plywood core was used for the pattern and it was trimmed to final profile. Bolt holes for the outer stem bolts were drilled and then the bolt holes received multiple coats of epoxy to seal them.
URL: http://riverswest-forums.266.s1.nabble.com/Point-Comfort-23-tp527p530.html
I will call, Charlie. I really appreciate your help. Right now I'm out of town but will be returning next week, so more progress will be made. In the meantime, I'll bring this up to date.
The next thing to do was to construct the stem and transom. The stem came first. Doug called out four layers of 18 mm plywood for the inner stem. I thought about how many times I'd be sharpening plane irons for the shaping of the stem and thought there should be a better way. I decided on CVG Fir cheeks with a single 18 mm plywood core. All of the planing to shape for the stem will be in the CVG Fir.
A template was made of door skin material, then transferred to the plywood core. The core was rough cut to shape then finished off on the router table with a pattern bit.
The two sections of the inner stem cheeks were splined to make a strong joint. These will be glued with thickened epoxy. One note: All mating surfaces were painted with epoxy - un-thickened - until they would no longer absorb epoxy. Then the thickened epoxy was painted onto the parts and the parts were clamped up. This avoids starving the joint of epoxy and makes the strongest possible joint.
The parts are glued up and clamped. Note the clamping cauls: They were glued to the parts with hot glue. The hot glue holds well but can be removed once the epoxy is set.
Once the epoxy cured, it was time to glue the cheeks to the core. Same technique was used to glue the cheeks to the core. A combination of screws and clamps hold it in place for the epoxy to cure.
After curing, the part went back to the router table. The plywood core was used for the pattern and it was trimmed to final profile. Bolt holes for the outer stem bolts were drilled and then the bolt holes received multiple coats of epoxy to seal them.
| Free forum by Nabble | Edit this page |