Building the Ashes Solo Day

classic Classic list List threaded Threaded
29 messages Options
12
Reply | Threaded
Open this post in threaded view
|

Re: Building the Ashes Solo Day

MarkR
Larger height differentials were smoothed with a scorp, shown in the picture below.  Also useful would be a convex spokeshave or similar bladed tool to work over the largely concave surface.


Once the rough shaping has been done, move on to a random orbit sander with a soft pad.  One must work judiciously with 80 grit.  Remember these strips started out only 3/16" thick.


Please note that the photos foreshorten the view of the boat.  The stems are much more narrow and sharp.
Reply | Threaded
Open this post in threaded view
|

Re: Building the Ashes Solo Day

Charlie43
This post was updated on .
CONTENTS DELETED
The author has deleted this message.
Reply | Threaded
Open this post in threaded view
|

Re: Building the Ashes Solo Day

MarkR
Charlie,

Quite possibly you don't appreciate the amount of sanding that goes into one of these boats.  When formed by rolling bevels, the strips are never perfectly aligned with one another.  Often there is an edge between strips of 1/32" as well as drops of dried glue.  There is a lot of material to be removed!  Even when using cove and bead, the individual strips require a lot of fairing.  The fairing needs to happen on both sides of the boat - inside and outside.  

So, efficiency is a priority for me.  I want to spend my time building a good boat, not hand sanding the boat.

My setup for the ROS includes a dust extractor which limits the dust introduced into the shop.  The ROS, when used like this is  much cleaner than a sanding block.

Noise is another manner.  The ROS is a noisier process, but doesn't take weeks; rather it takes hours.

So, that's my case for using power tools.
Reply | Threaded
Open this post in threaded view
|

Re: Building the Ashes Solo Day

Charlie43
This post was updated on .
CONTENTS DELETED
The author has deleted this message.
Reply | Threaded
Open this post in threaded view
|

Re: Building the Ashes Solo Day

MarkR
No disrespect intended, but you'd be there a long time with your file.  

Strippers tend to teach patience and a relaxed efficiency.  Alternately they teach: frustration, self-doubt and ultimately, humility.
Reply | Threaded
Open this post in threaded view
|

Re: Building the Ashes Solo Day

MarkR
In reply to this post by MarkR
I'm on the forum for the first time in a while.  I noticed that I hadn't finished this thread, even though the boat is finished.  Since I've got the photos, I will post them here and show how it finished up.


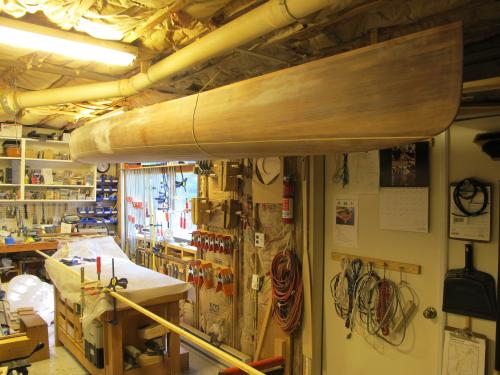
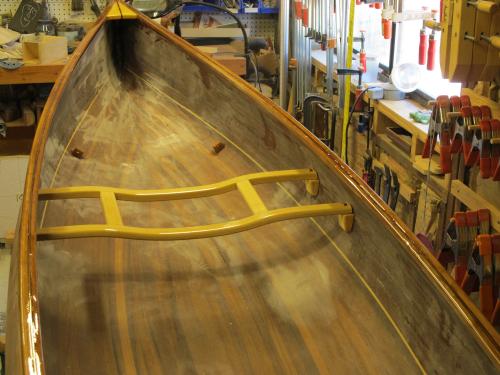
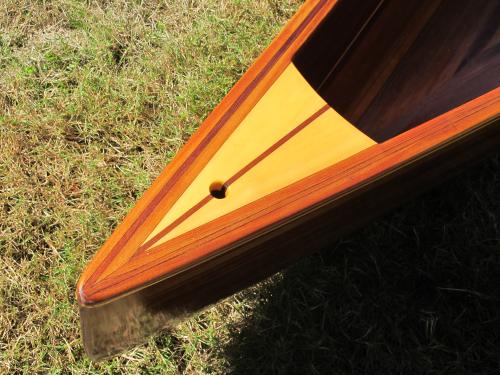
Once the interior was glassed, the hull was suspended to clear bench space.  Next up was to make the gunnel parts.  The outwale was to be Western Red Cedar with an Alaskan Yellow Cedar strip within it.  This echoes the thin AYC waterline strip.


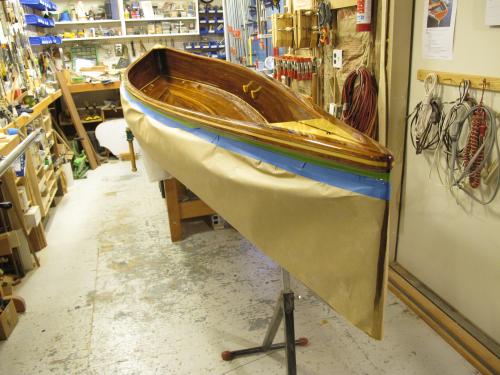
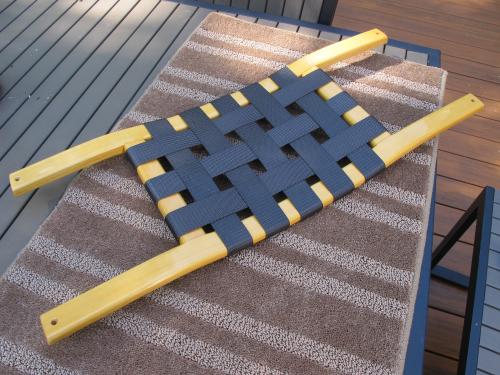
Once made and rough shaped, these were installed using thickened epoxy and lots of clamps.  After the gunnels were completed, it was time to get the boat wet.  A temporary seat was made that sat on the bottom and could slide forward and aft.  This would be used to establish a balance point to get the trim just right.
Reply | Threaded
Open this post in threaded view
|

Re: Building the Ashes Solo Day

MarkR
The boat was launched into the Willamette River with the help of Bruce G.  Bruce took photos from the dock as I shifted the temporary seat forward and back to establish trim.  We had four positions: 0 - 3.


Now it was time to finish up the interior fittings.  To save weight, small Spanish Cedar tabs were made for attaching stowed gear.  These tabs had a hole in them for shock cord and were reinforced with fiberglass cloth.  Six tabs were attached to the interior with epoxy.


Next, the seat cleats were glued into the hull and the seat frame was fitted.


Two of the hold down tabs are visible forward of the seat frame.  We're almost ready to finish it.

Reply | Threaded
Open this post in threaded view
|

Re: Building the Ashes Solo Day

MarkR


The exterior and interior of the hull was finished with eight coats of gloss varnish.  Here, the gunnels are being finished with a final finish coat.  The interior was top-coated with matte finish varnish to provide a contrast to the bright finished exterior and interior fittings.


The seat was woven with seat belt material - light and strong.  The seat frame was installed with bronze screws & finishing washers.  These are the only fasteners in the boat.


The finished boat is 15' long, 29" wide and weighed in just a tick under 32#.  It was conceived as a minimalist canoe and has succeeded.  


Reply | Threaded
Open this post in threaded view
|

Re: Building the Ashes Solo Day

Charlie43
In reply to this post by MarkR
Mark,

Your work is superb, like usual and as always. Congrats.

Charlie
12